Using the text editing tools in Joomla.
Prerequisites
Administrator access to a Joomla site (version 5 or above). See 1.0 Admin Login.
Tables
In this tutorial we will create and save a new article for demonstration purposes, and then delete the article. You may use an existing article on your site if you choose.
Steps
- Login to Joomla as an administrator and navigate to the Home Dashboard.
- In the left side menu, expand Content and click on Articles.
- Click on the New button. A new-article form appears.
- Enter a title then click into the text editing area.
- Expand the toolbar by clicking on the ellipsis icon.
- The toolbar adapts to the browser width. The configuration and position of icons may be different than shown here.
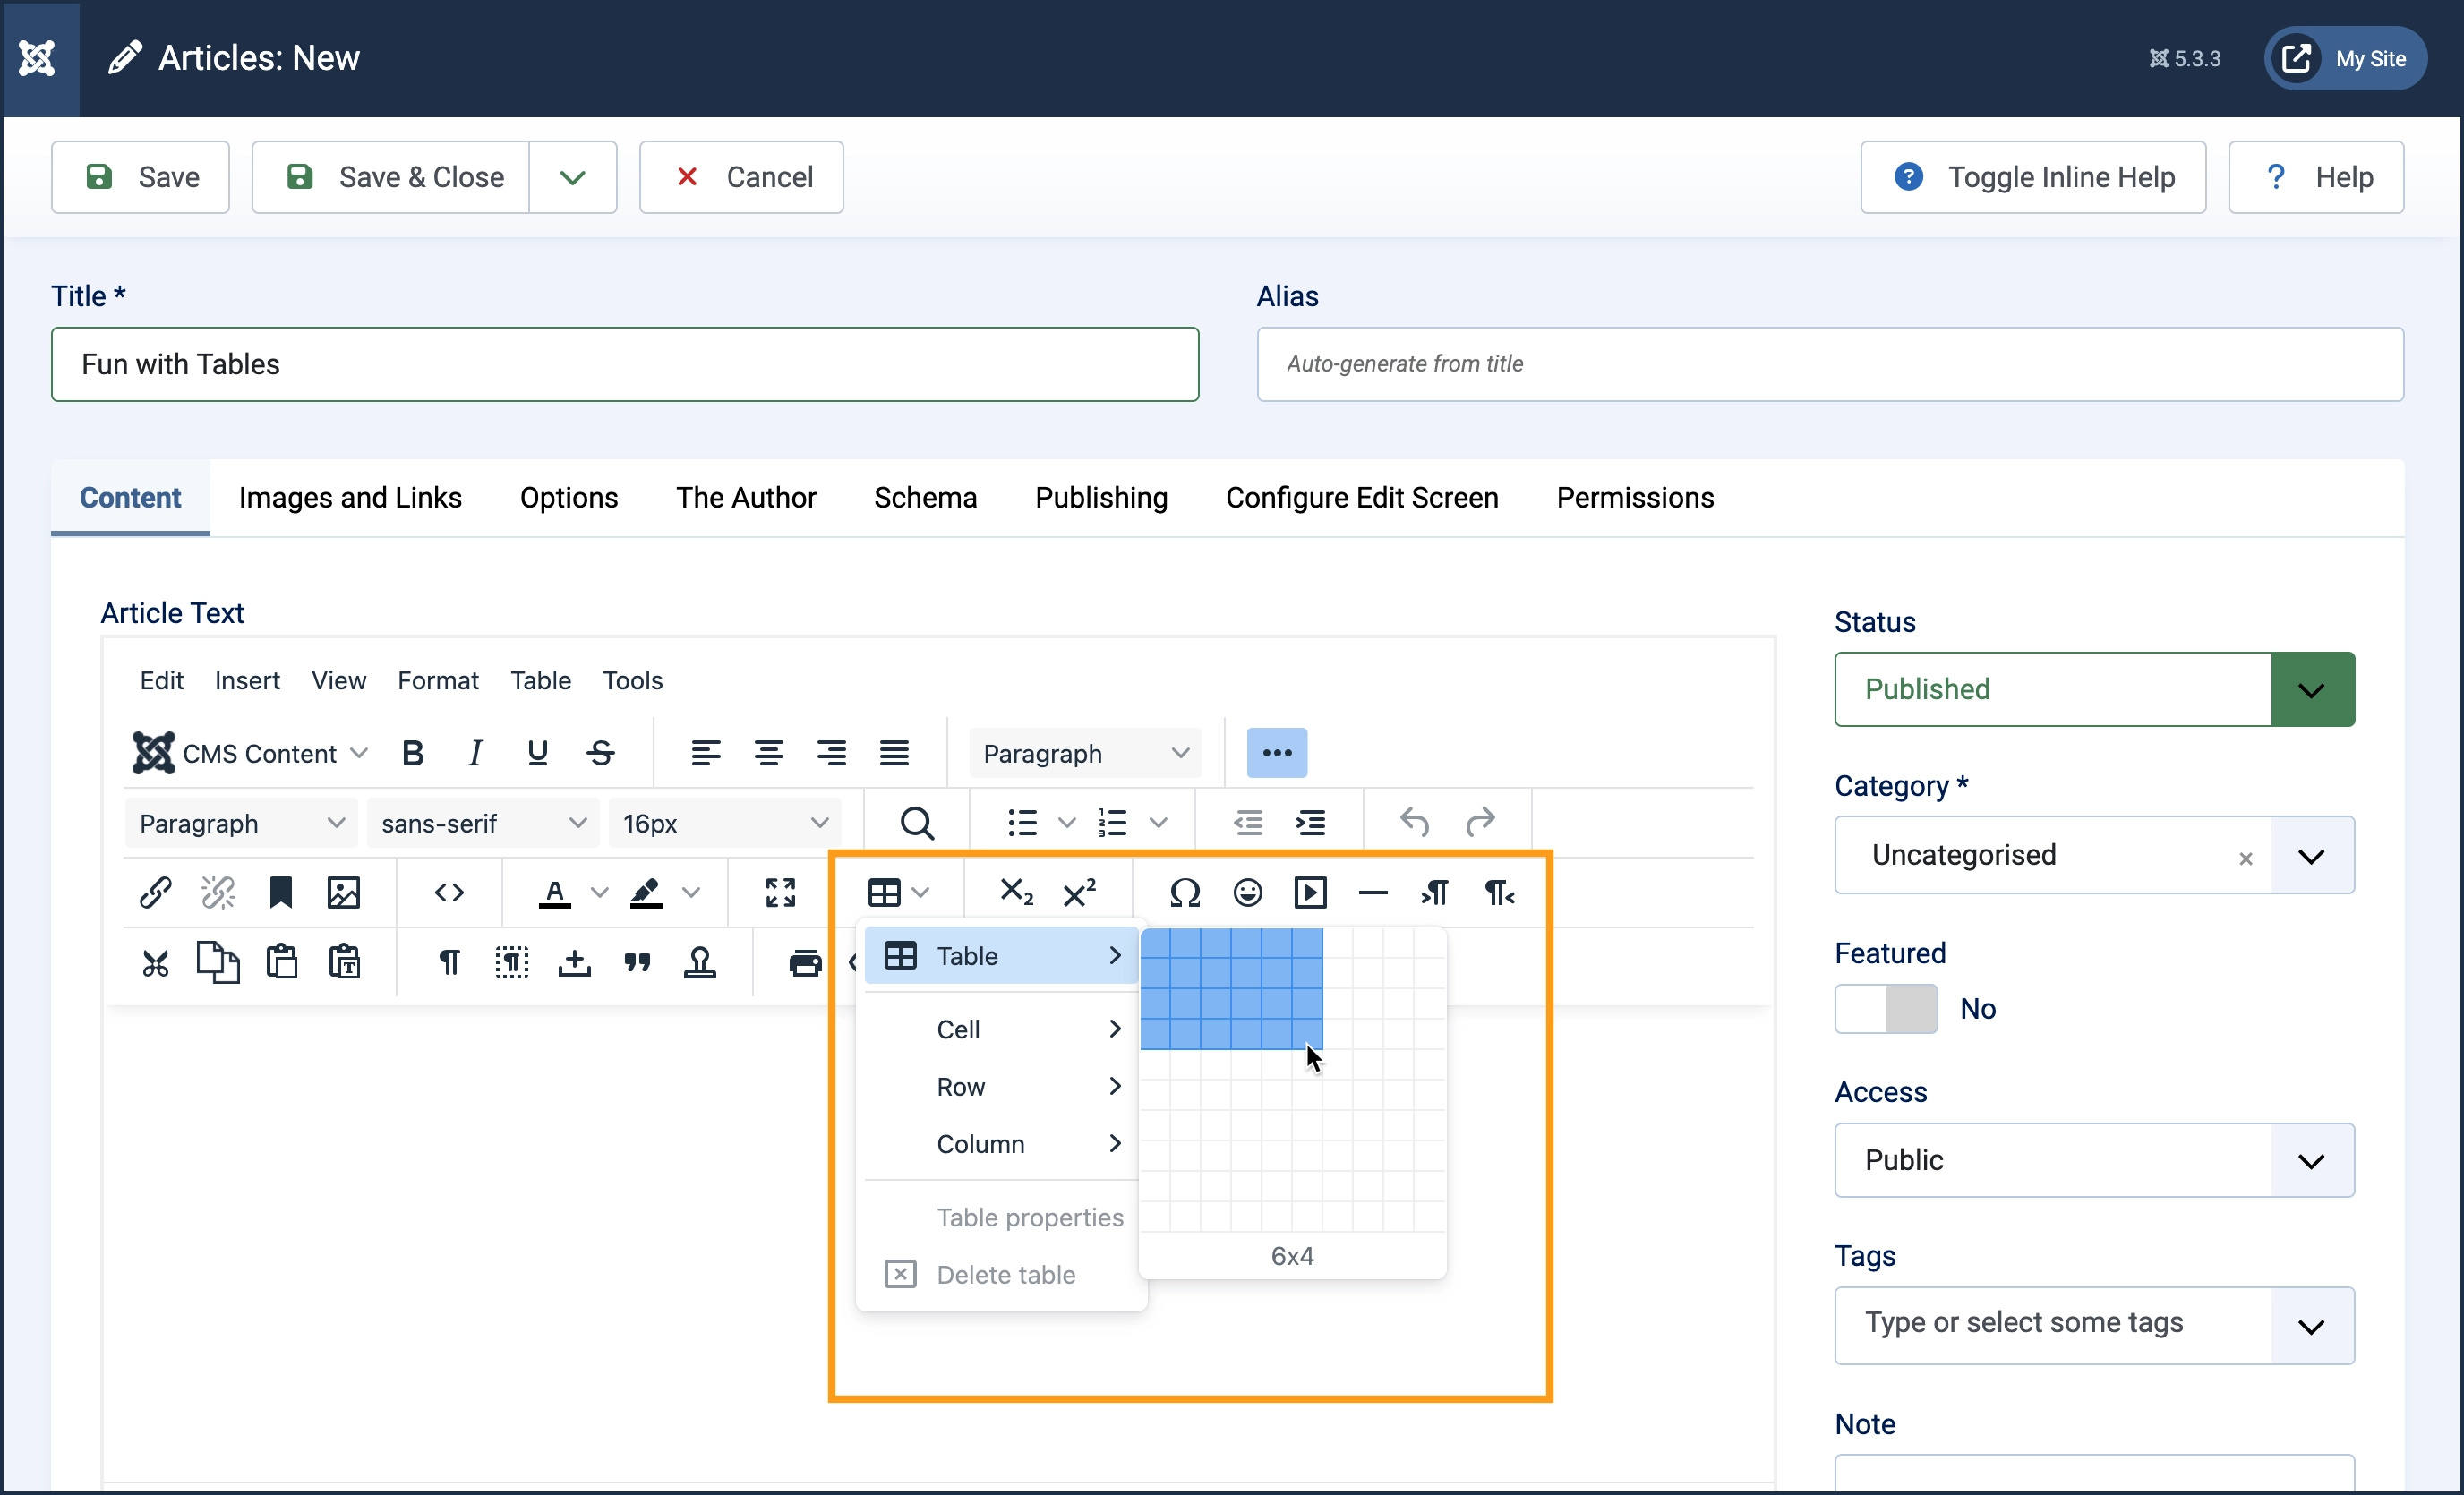
- The table icon is a dropdown menu. Expand the menu and hover over the first option, Table.
- A grid pops up to the right.
- Hover over the grid to define the desired size of the table, then click to insert a table.
- Click into a cell to enter content.
- Tapping the Tab key advances the cursor to the next cell.
- Tapping the Tab key in the last cell of the table will add a row.
- When the cursor is in any cell, a contextual menu appears below the table.
- Here you can add or delete rows or columns.
- Hover over the icons to reveal their function.
- Adjusting column and table width.
- Hover over the border line dividing two columns and note the cursor changes.
- Click and drag the border left or right to change the width of a column.
- Dragging the far right border adjusts the width of the table.
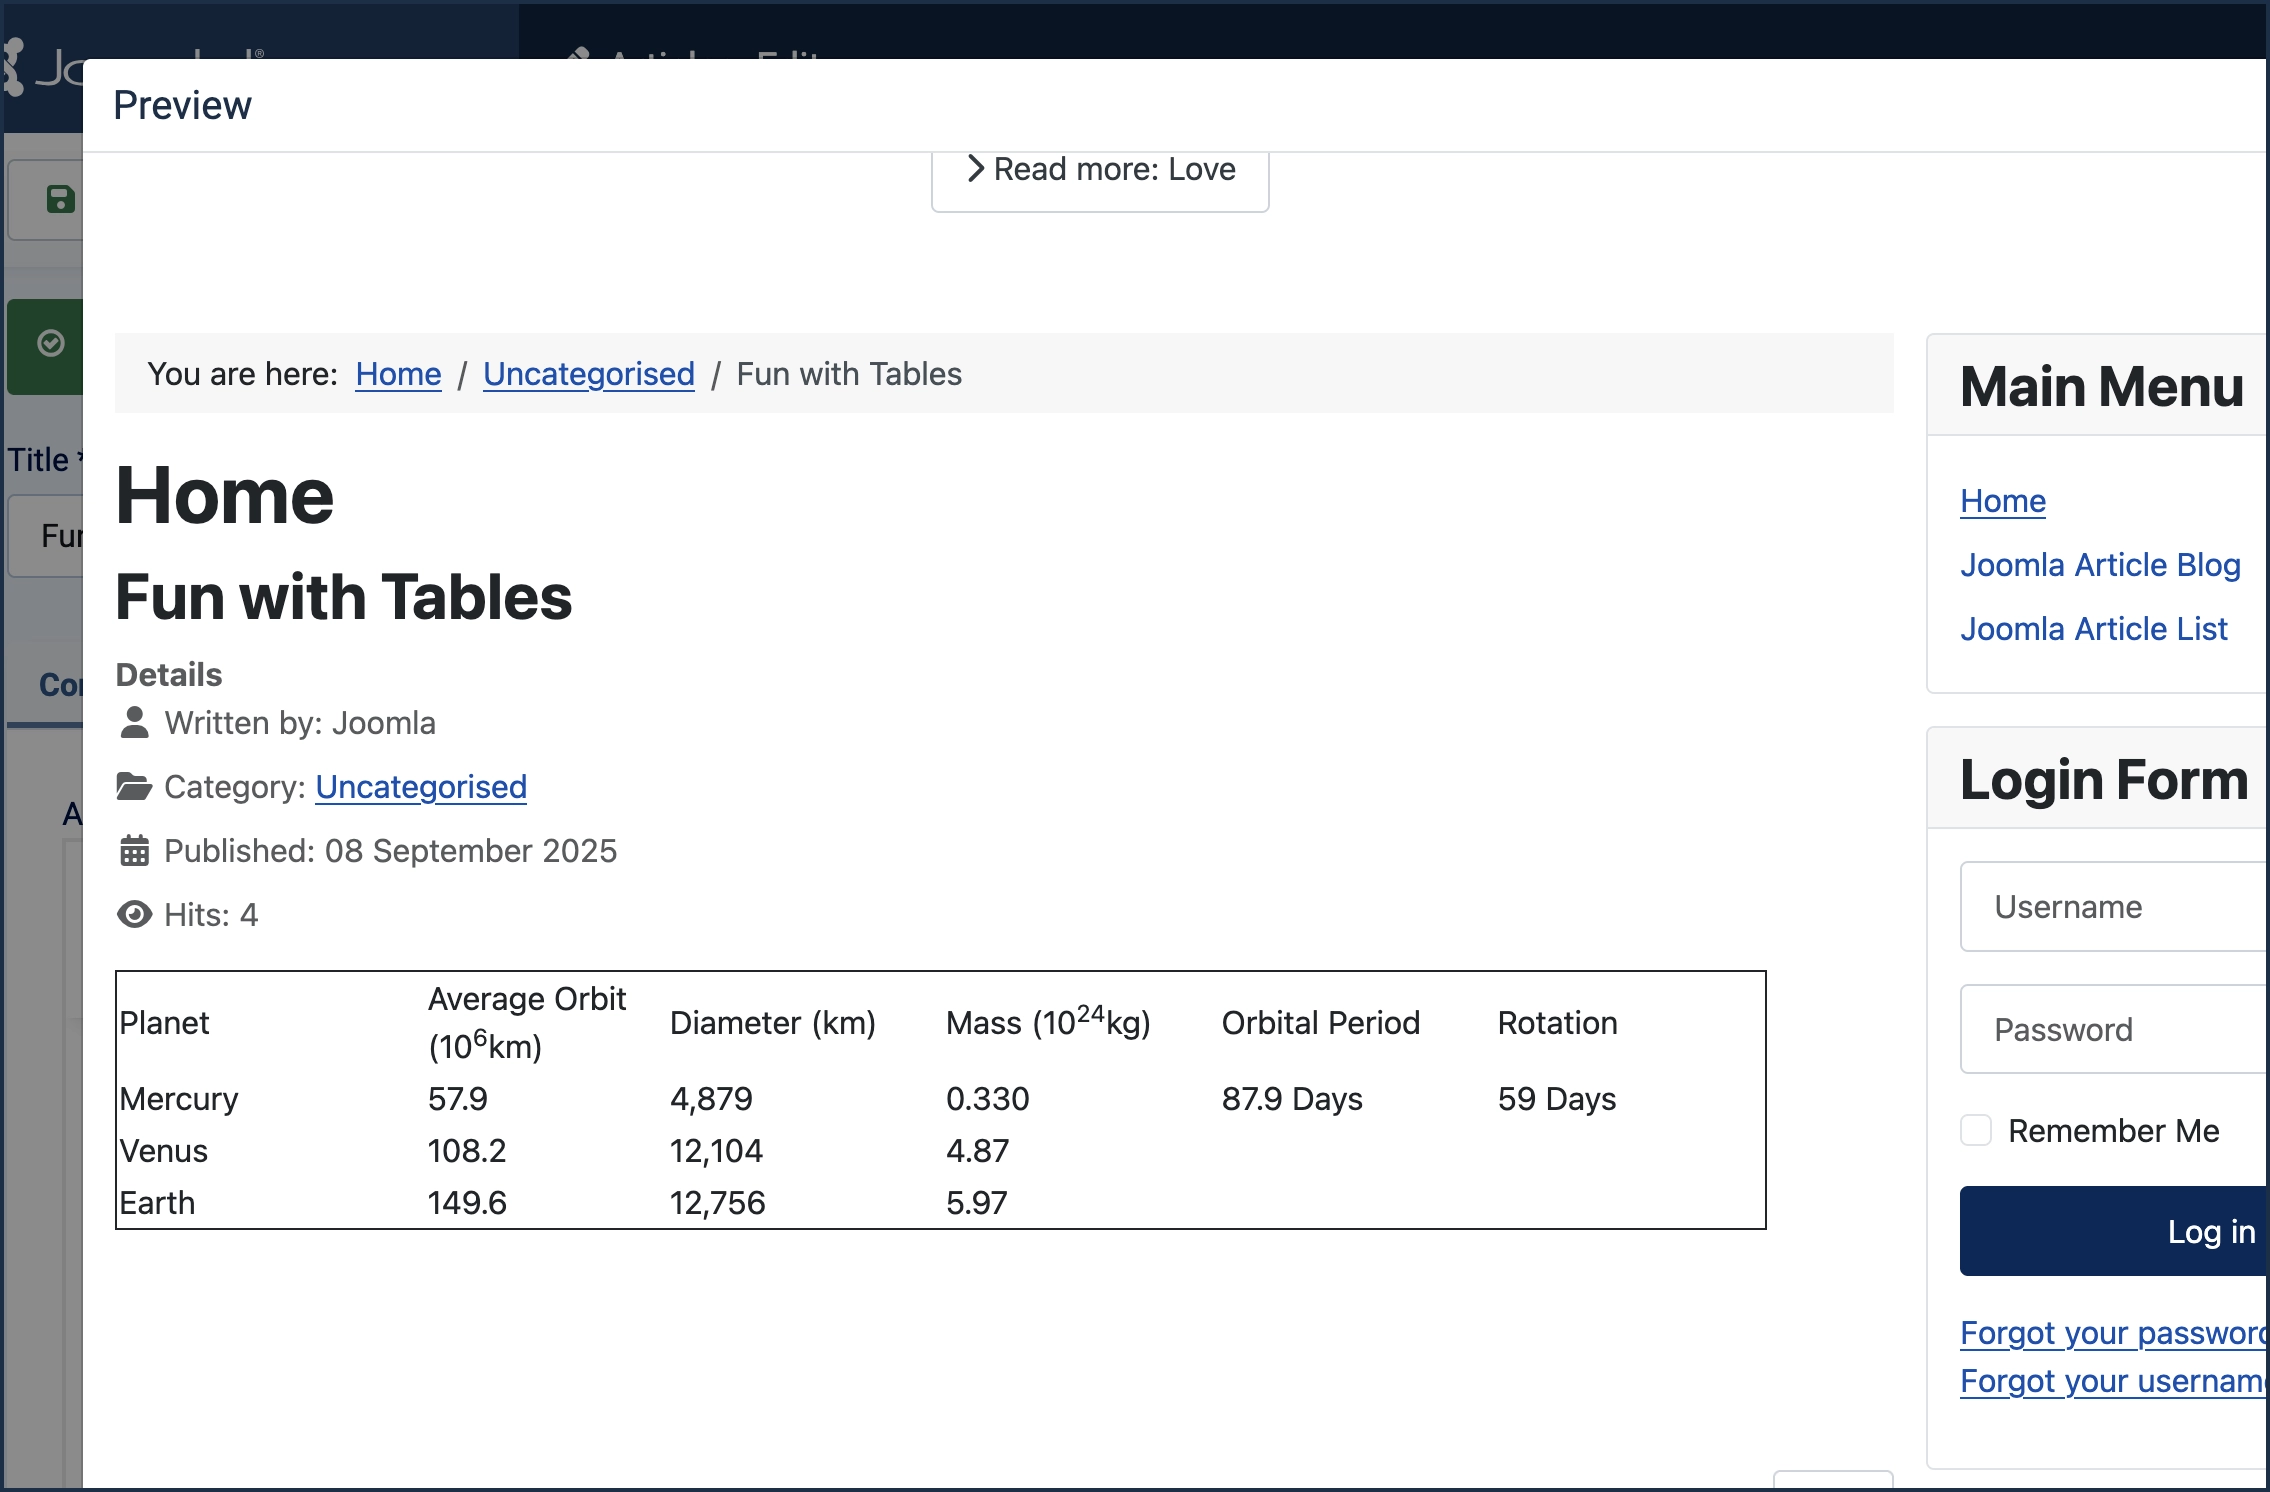
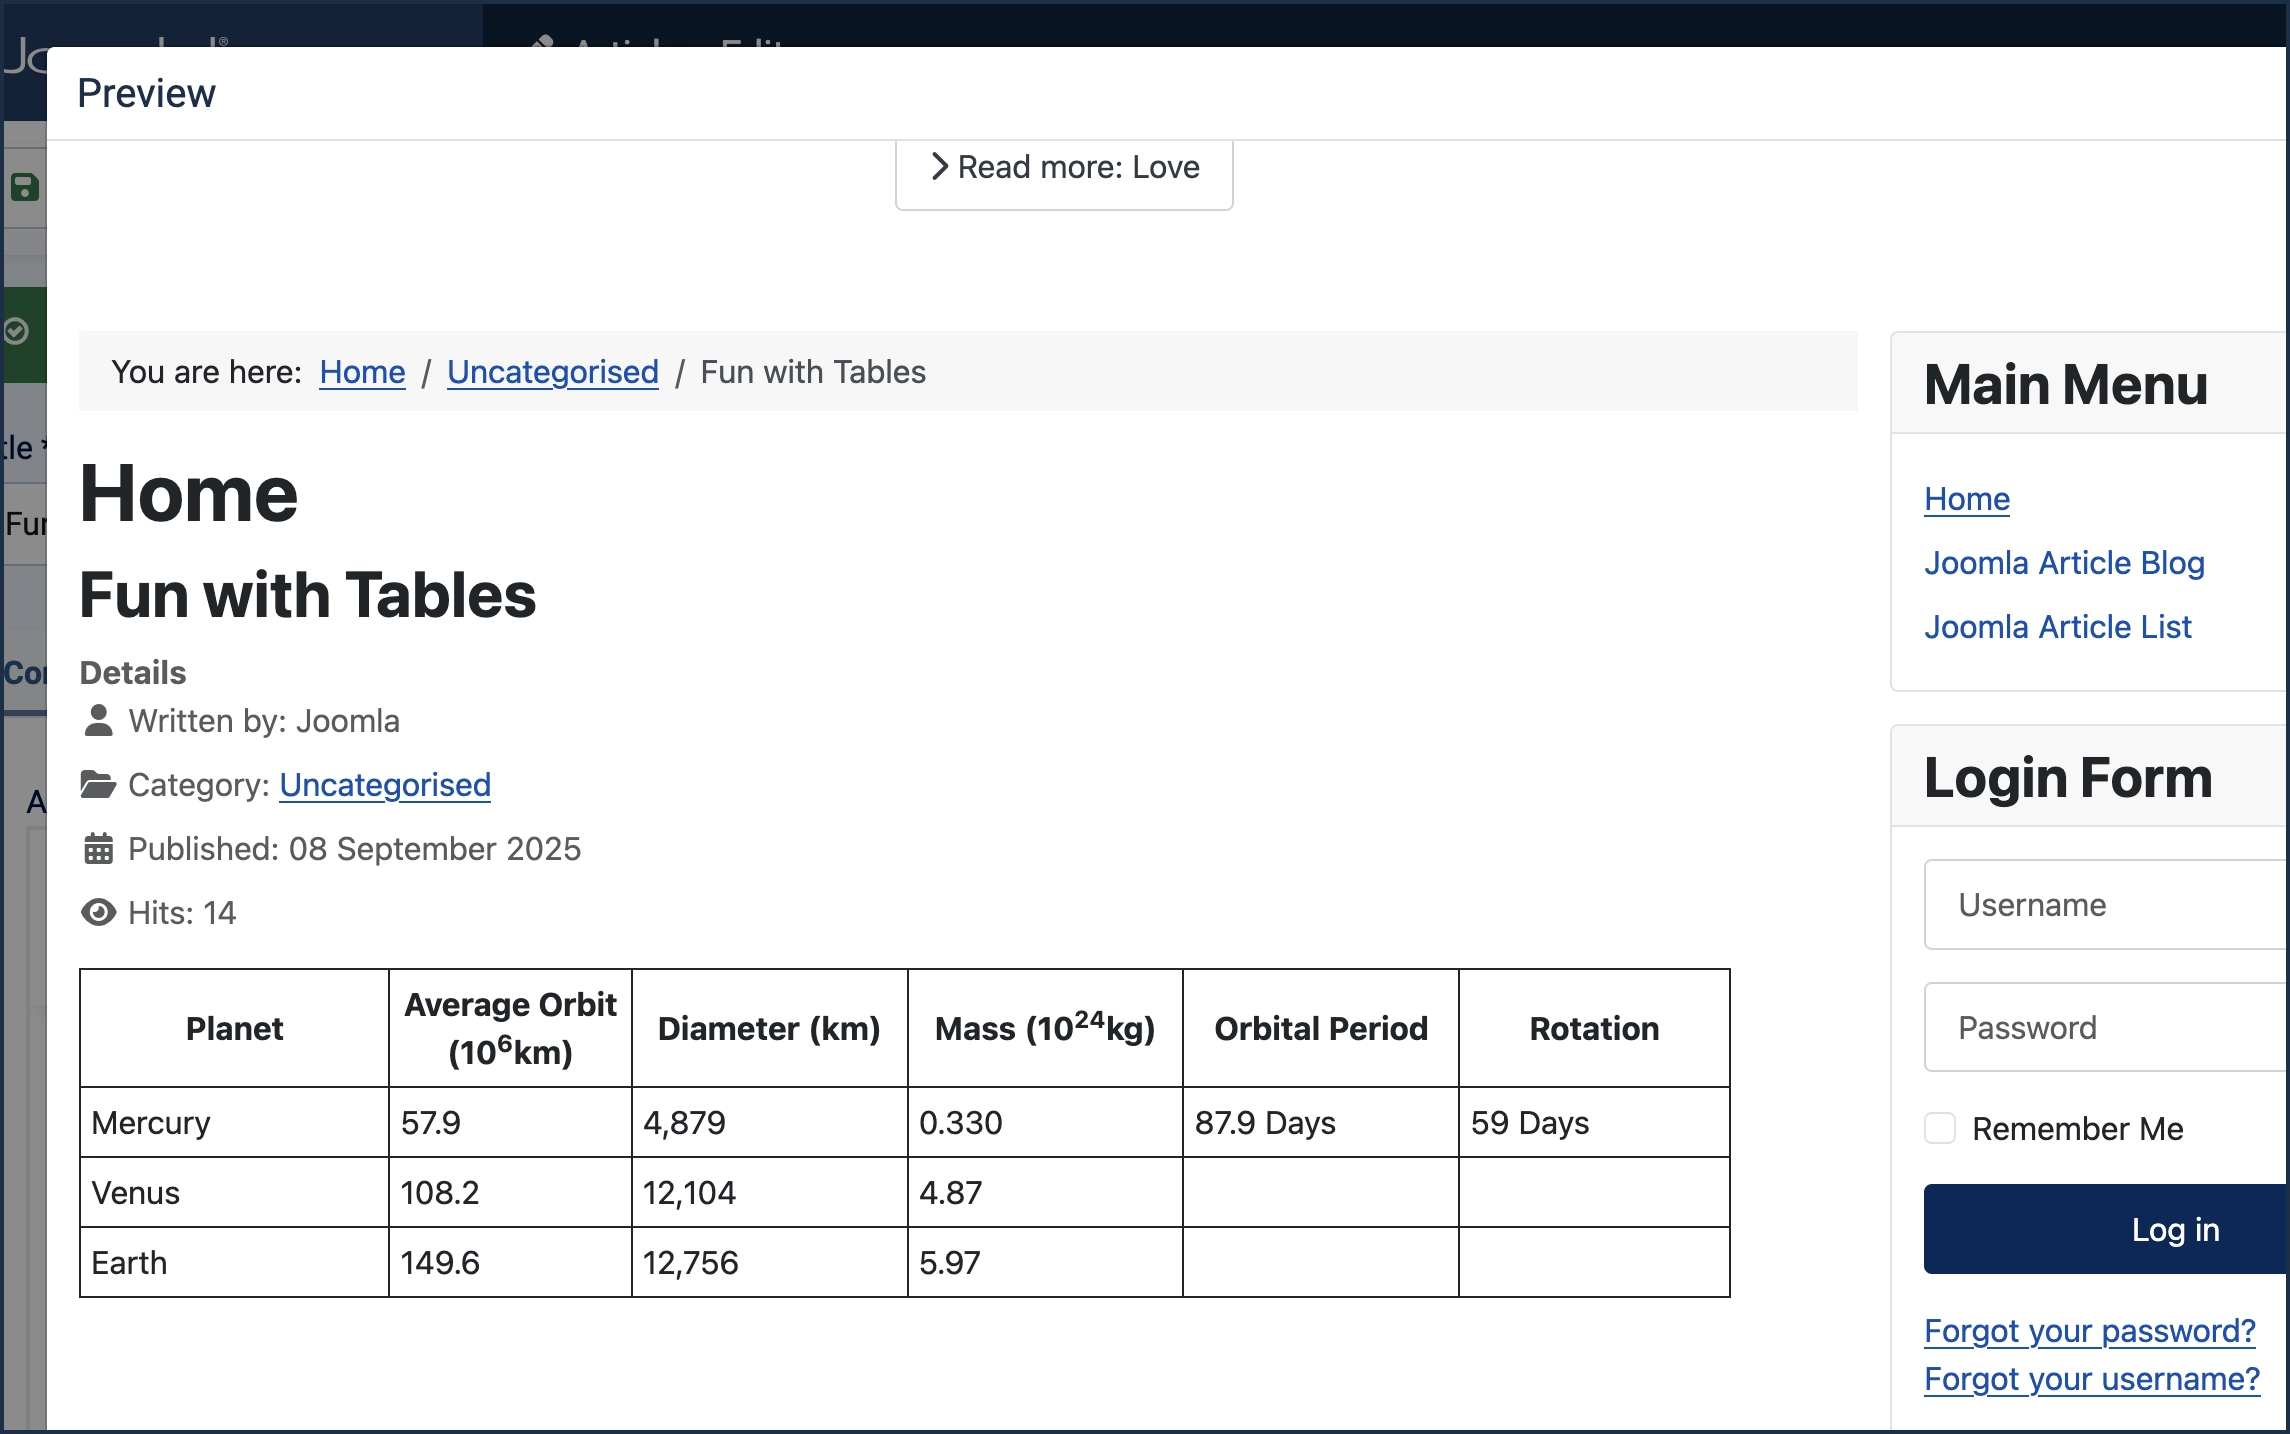
- Save and preview your article by clicking the Save button followed by the Preview button.
- A popup frame of your article appears.
- Scroll down to examine the table.
- Note there are no borders between the table cells.
- Close the preview window.
- Add cell borders
- Click into the top-left cell and drag down and to the right to highlight all the cells in the table.
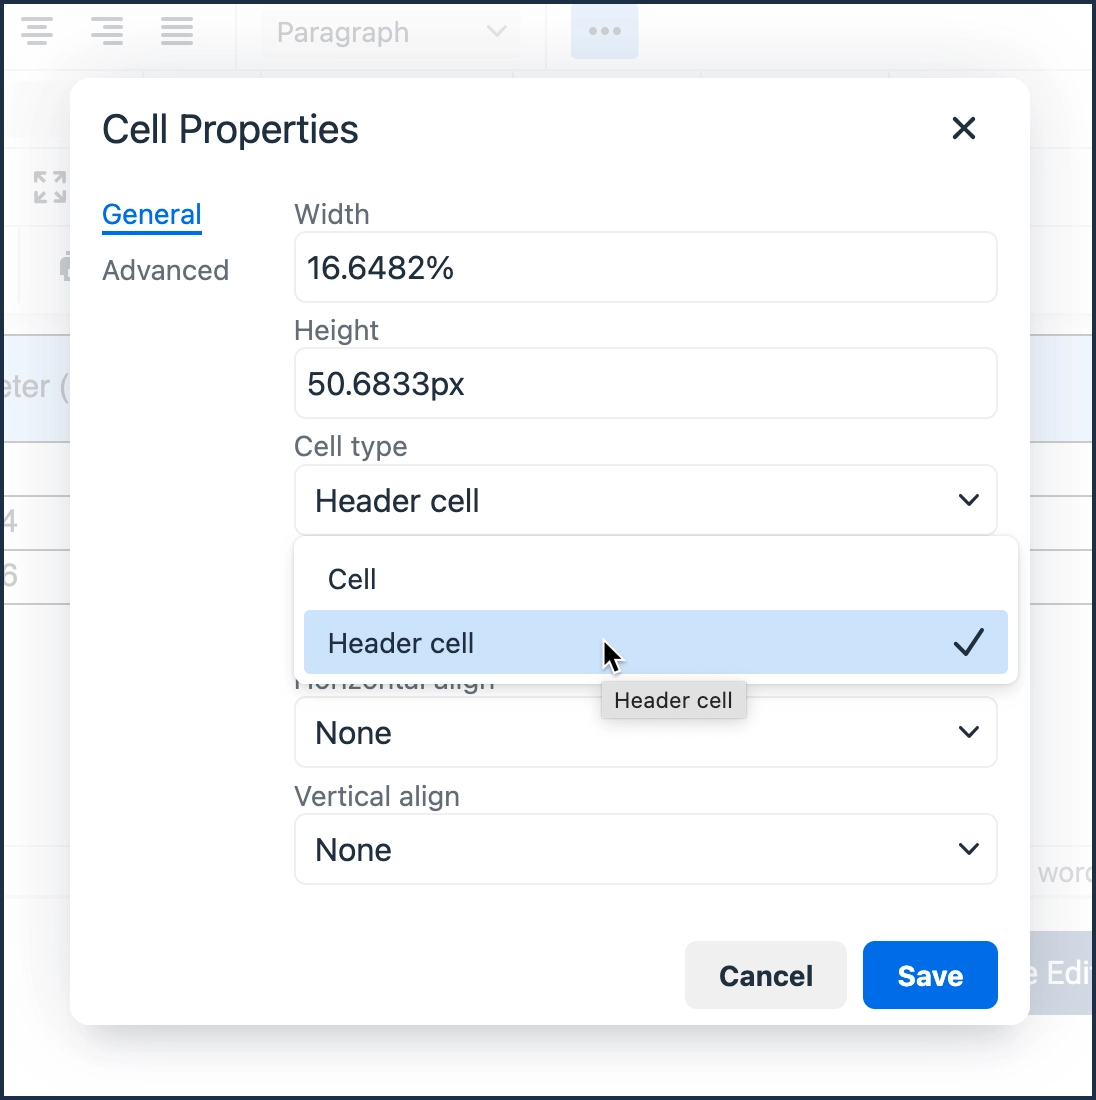
- Right-click in any cell and open the Cell Properties window.
- Click on Advanced. Set the Border width to 1px and the Border style to Solid.
- Save and close the form.
- Save the article and preview.
- Note that all the cells are formatted the same. Next we'll format the table heading.
- Close the preview window
- Set the table header row.
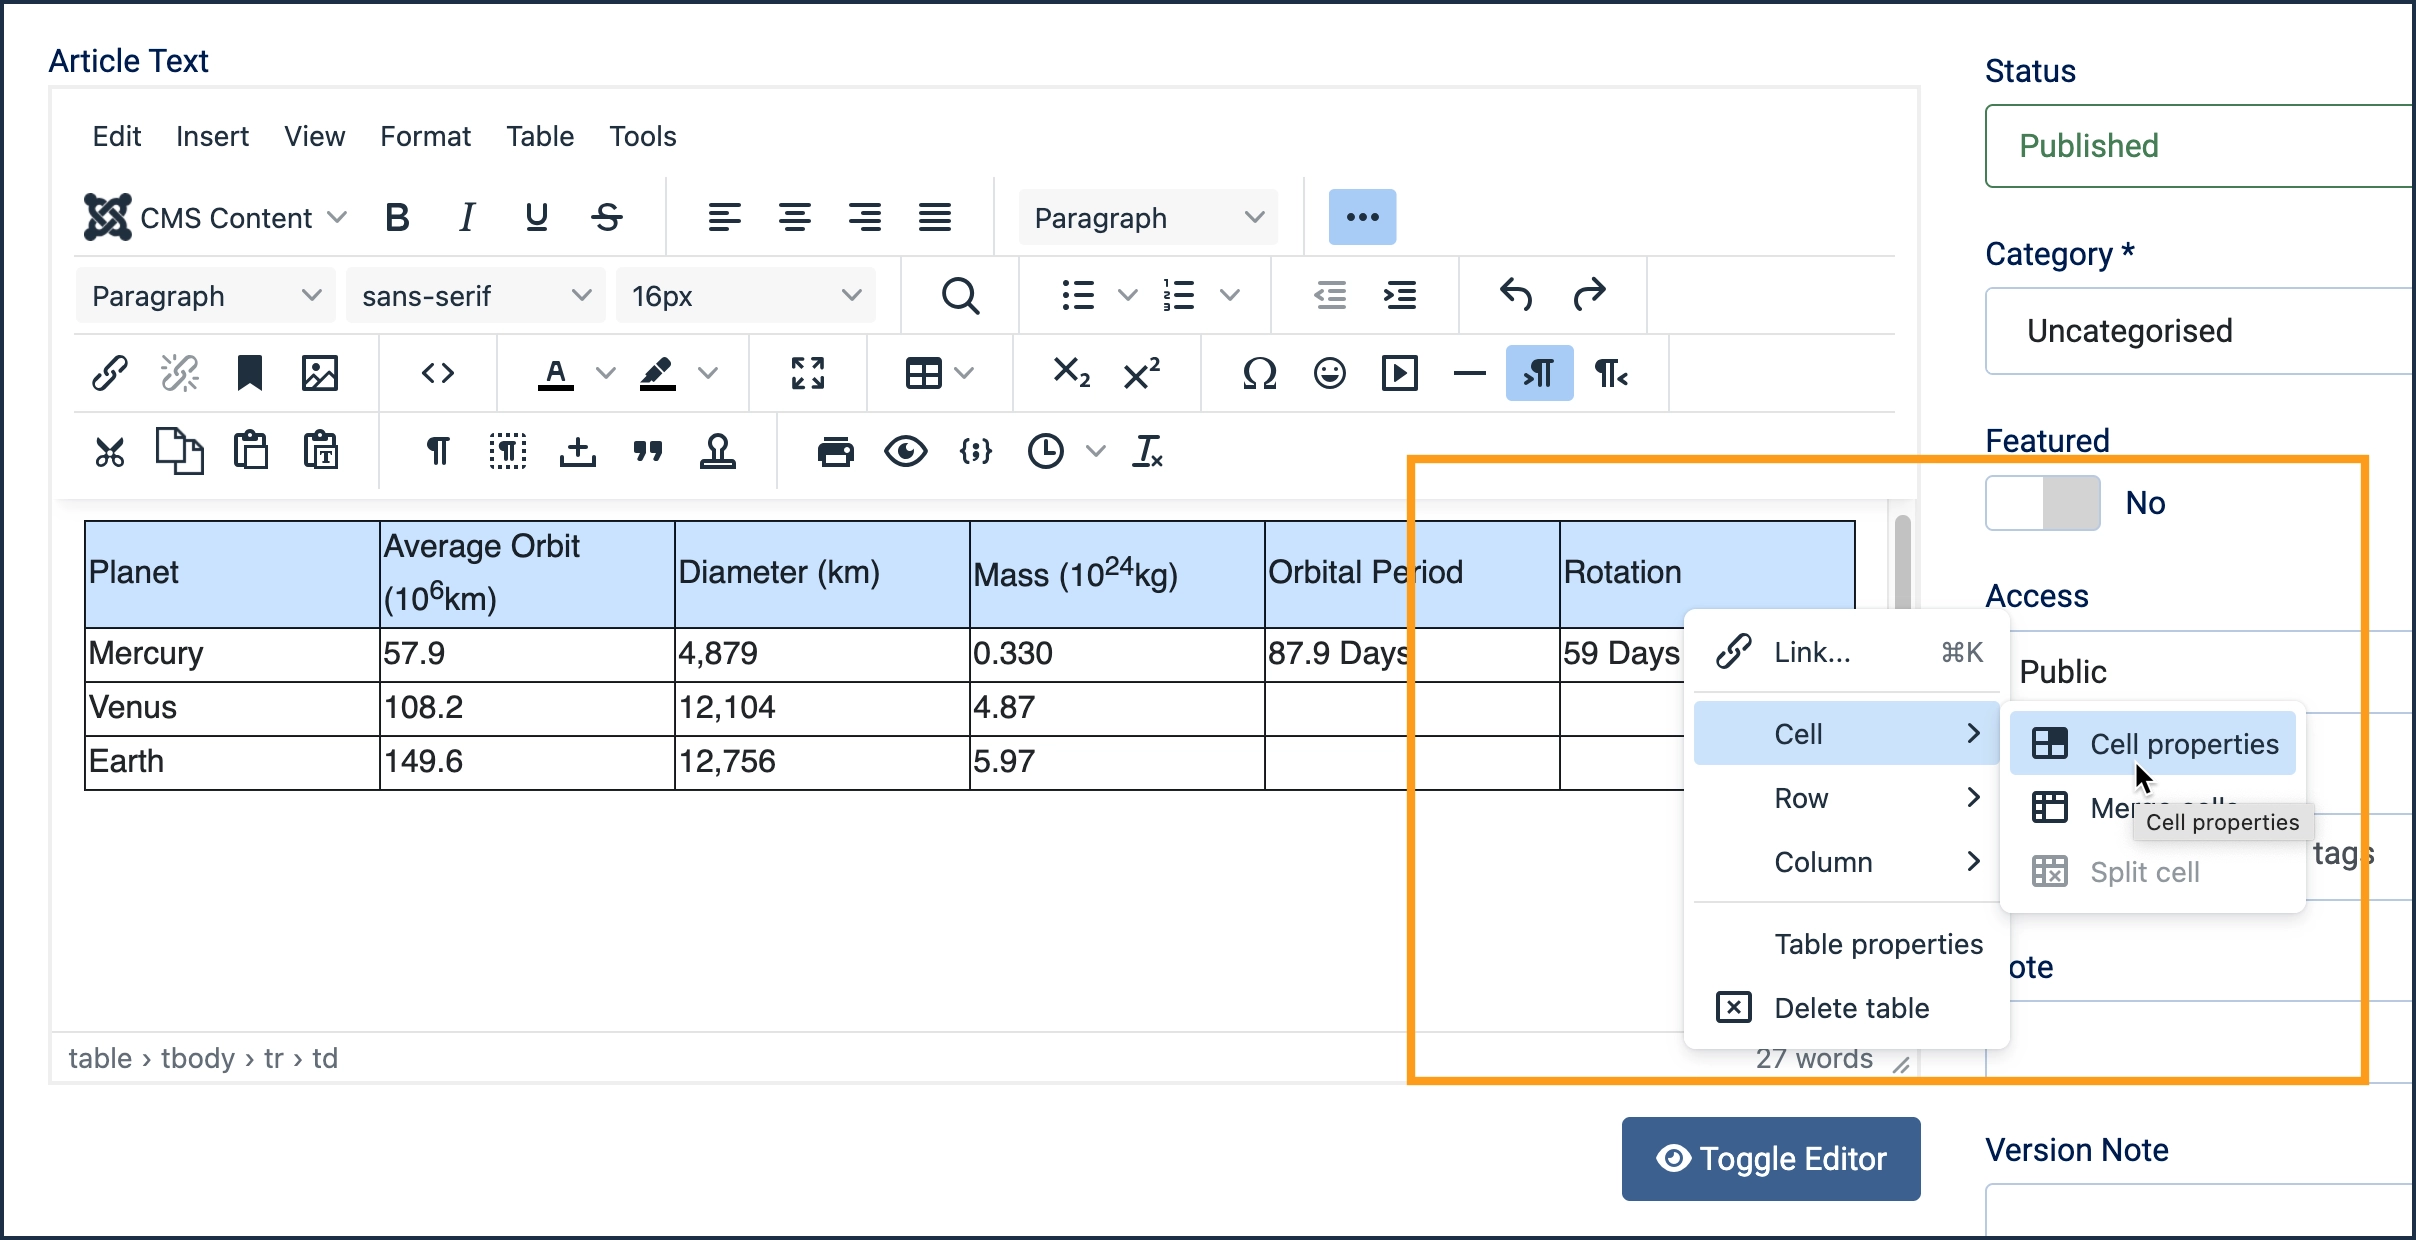
- Highlight the top row of the table by clicking into the top left cell and drag to the right while holding down the mouse button.
- Right-click in any of the highlighted cells.
- Hover over the Cell option then click on Cell Properties.
- Under Cell Type choose Header Cell.
- Under Horizontal align choose Center then save.
- Note that the header cell contents are centered and formatted with bold text.
- Save the article and preview.
- Note that the cell content is tight against the cell borders.
- Close the preview window.
- Adjust the cell padding.
- Right-click anywhere in the table and select Table Properties.
- Enter 5px under Cell padding.
- Save the article and preview.
Concepts
- Setting header cells is an important semantic and accessibility issue. Creating Accessible Tables
- Browsers will adjust table and cell widths differently depending on browser width and window size.
- Tables are intended for displaying tabular data. At one time it was popular to use tables for layout to position content on a page. They should never be used for this purpose.