Workflows
Publishing Workflow
Introduction
In Joomla, a workflow is a sequence of steps in the life of an article from conception to demise. The steps are usually performed by different individuals with different responsibilities. For example, in the newspaper world a sub-editor takes a story from a reporter and checks for accuracy, grammar, readability and length, and perhaps more. The sub-editor will then pass the story to the editor who may accept or reject the story, decide where to place it in the paper, and so on.
The Workflow component is used to add stages to articles to enhance the static states (unpublished, published, trashed and archived) with transitions. The static states and transitions are recorded separately so that Workflows can be enabled or disabled as required without affecting the state of content items. Workflows are enabled or disabled in the Articles: Options page Integration tab.
There is a tutorial page containing steps for the creation an example workflow: Workflow Scenarios.
Terms & Definitions
- Workflow: A workflow is a complete sequence of steps. Several different workflows can be created for different purposes. The Workflow component contains a Basic Workflow and the Blog sample data has a more complex Blog Workflow.
- Stage: A stage is a location within a workflow. For example, an unpublished article may be at Stage 1: In Preparation or Stage 2: Ready for Review, and so on. It is the stage for the item that is recorded in the database.
- Transition: A transition is a change from one stage to another, often to the next in the workflow but could be to the previous stage or initial stage.
- State: The state of an article can be unpublished, published, trashed or archived. A state can be changed by executing a workflow transition provided that the user has permission to change state.
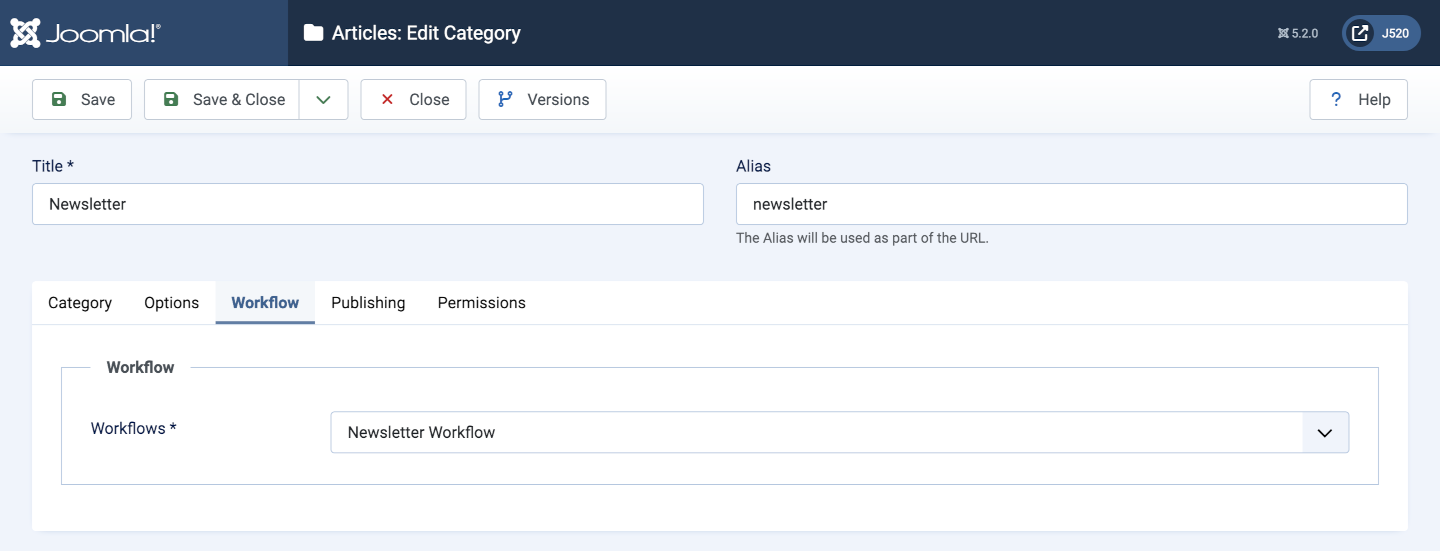
- Category: When workflows are in use, a specific Workflow can be selected for a category in the Article: Edit Category form Workflow tab.
The Workflows List
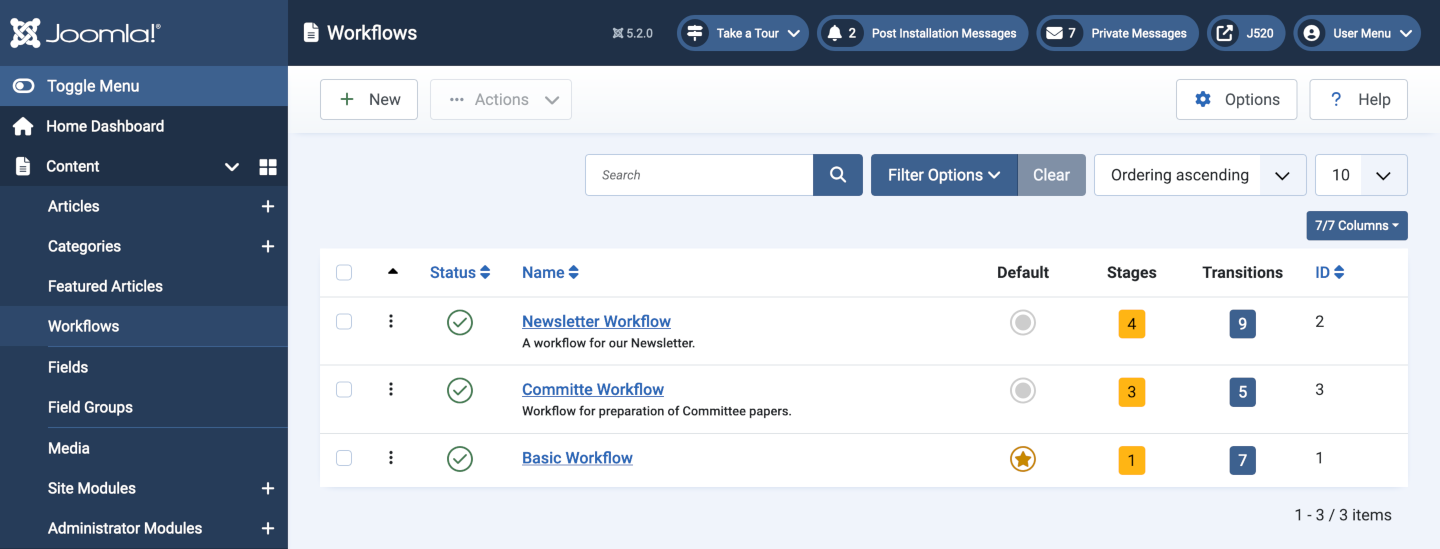
When workflows are enabled the list of available workflows can be seen by selection of Content → Workflows from the Administrator menu.
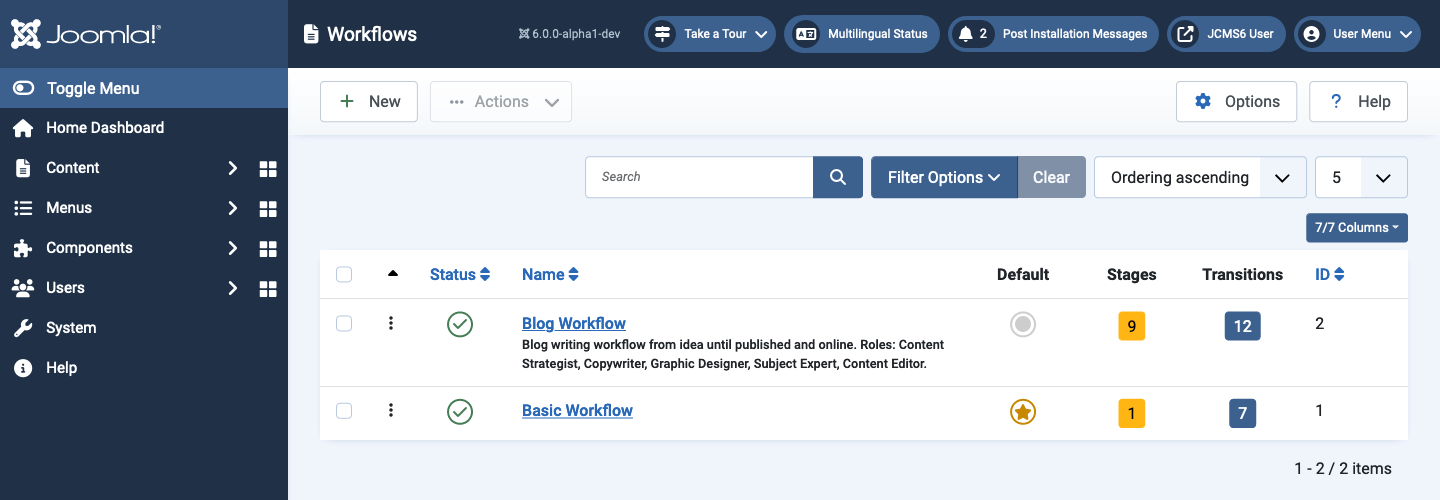
- The Status of a workflow may be Enabled, Disabled or Trashed.
- The Name is a link to the workflow Edit form.
- The Default item is used for new items that are not assigned to a category that has a defined workflow.
- The Stages item is a button showing the number of stages and a link to the list of stages for the workflow.
- The Transitions item is a button showing the number of transitions and a link to the list of transitions for the workflow.
- The ID is a the numerical value of the workflow used internally.
Stages
The stages are accessed via the Workflows list. Select the yellow button showing the number of stages.
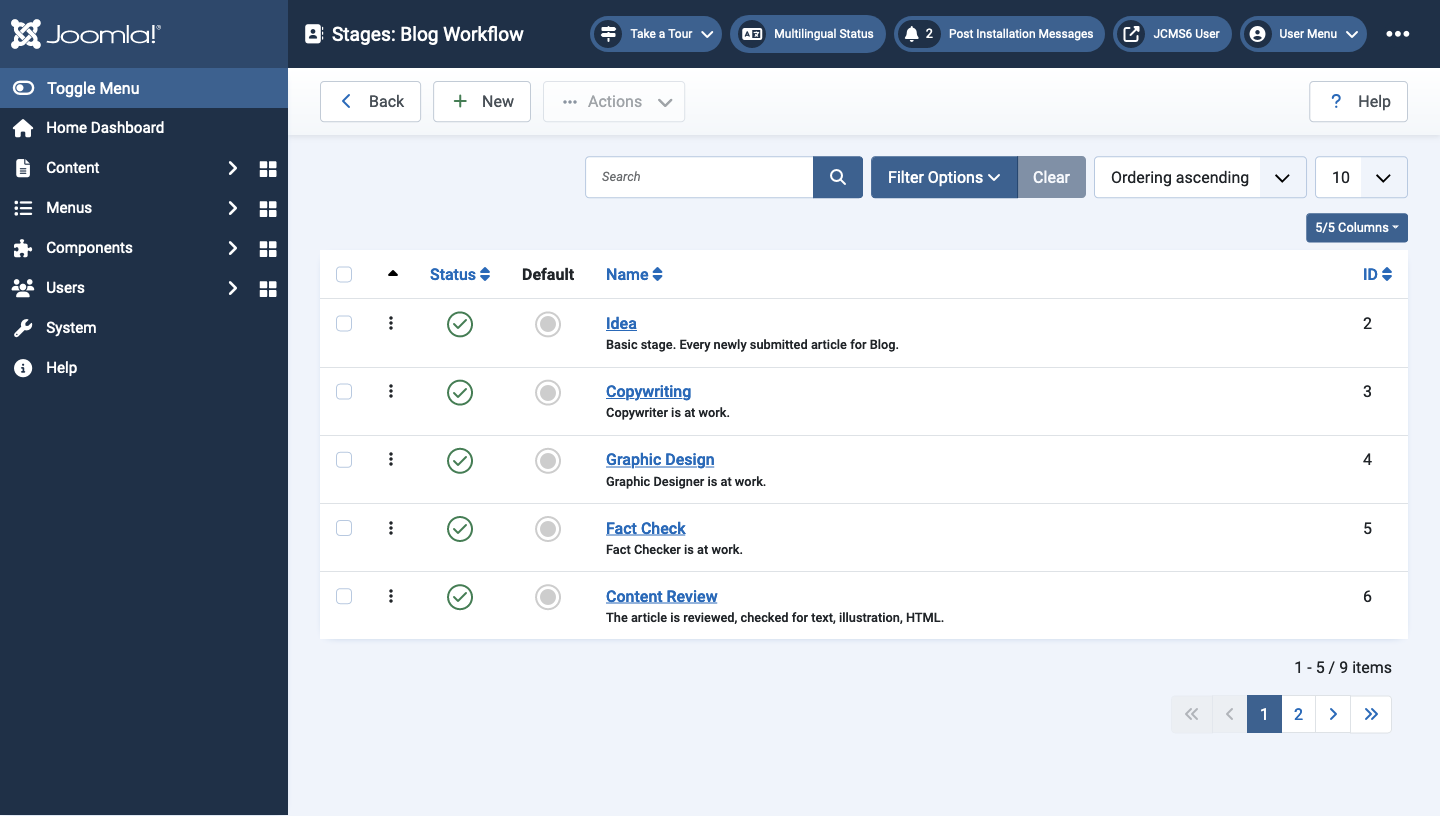
Select the name of a stage to edit it.
Transitions
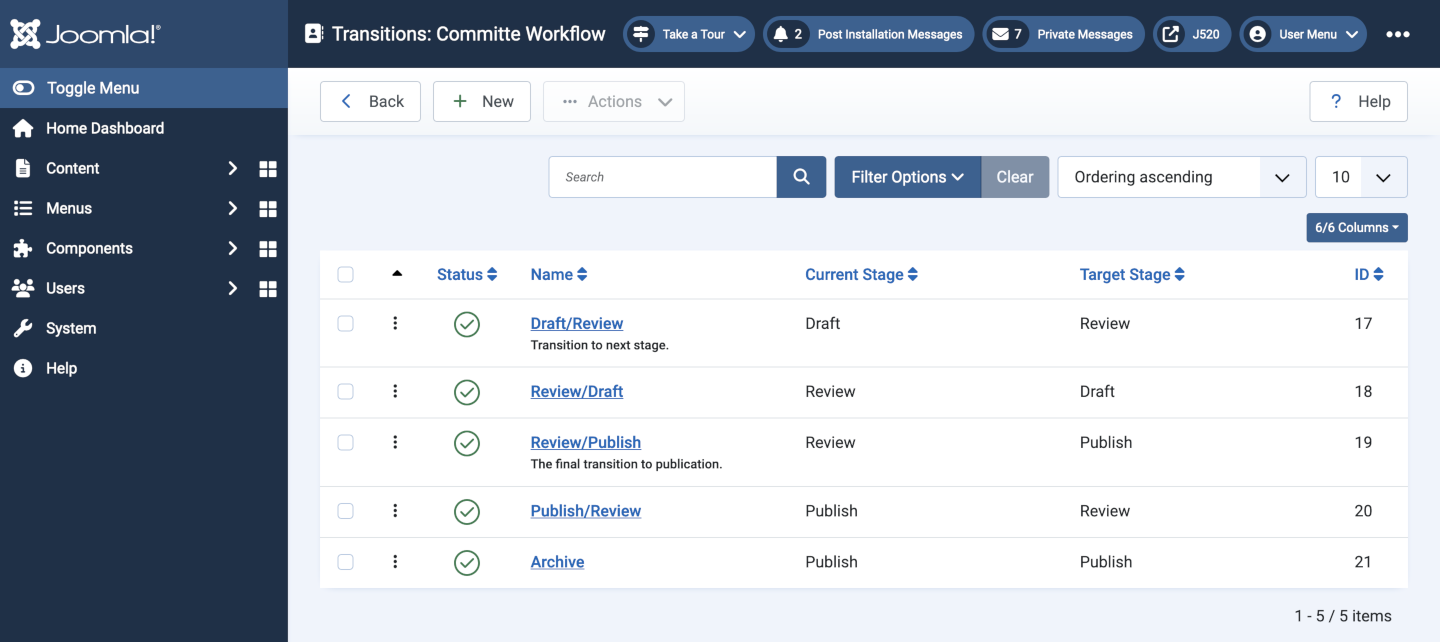
In workflows, articles transition from one stage to another. The transitions are managed through the Transitions list.

- The Current Stage defines where this transition starts.
- The Target Stage defines where this transition ends.
Transition Stages
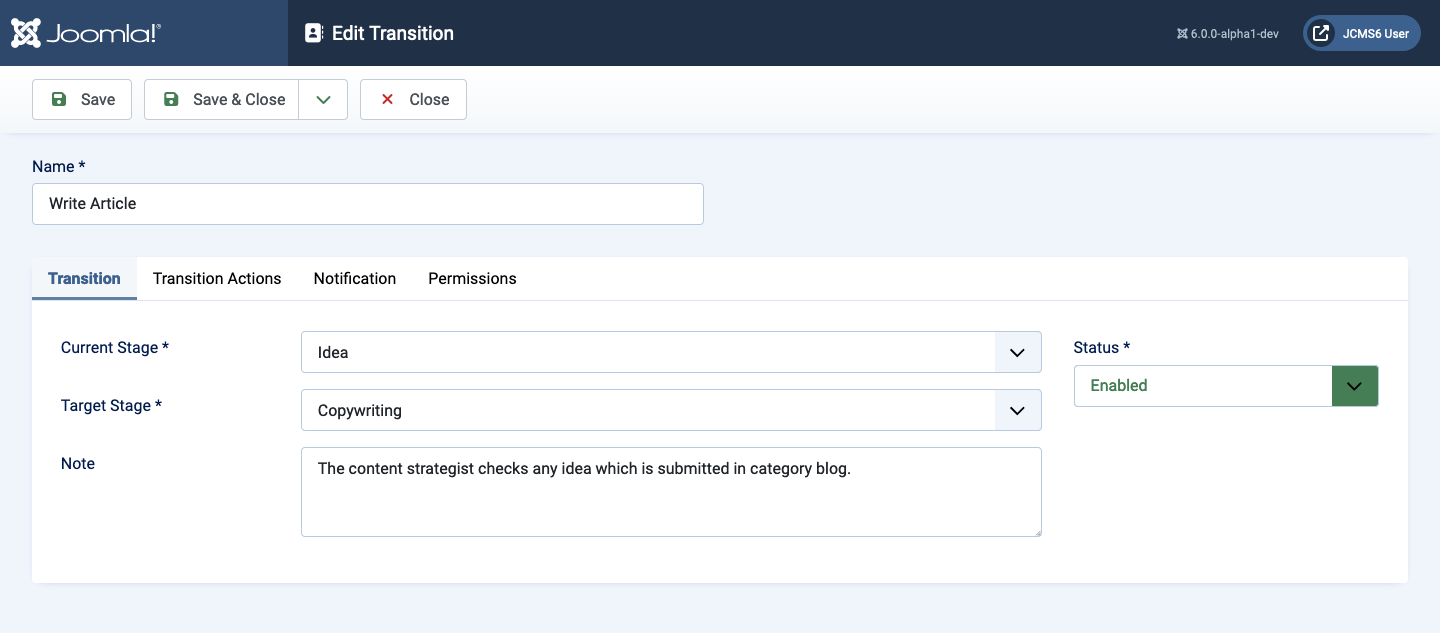
The Current and Target stages are set in the Edit Transition form:
The Transition Actions tab is used to define the State the item will be in after the transition is complete.
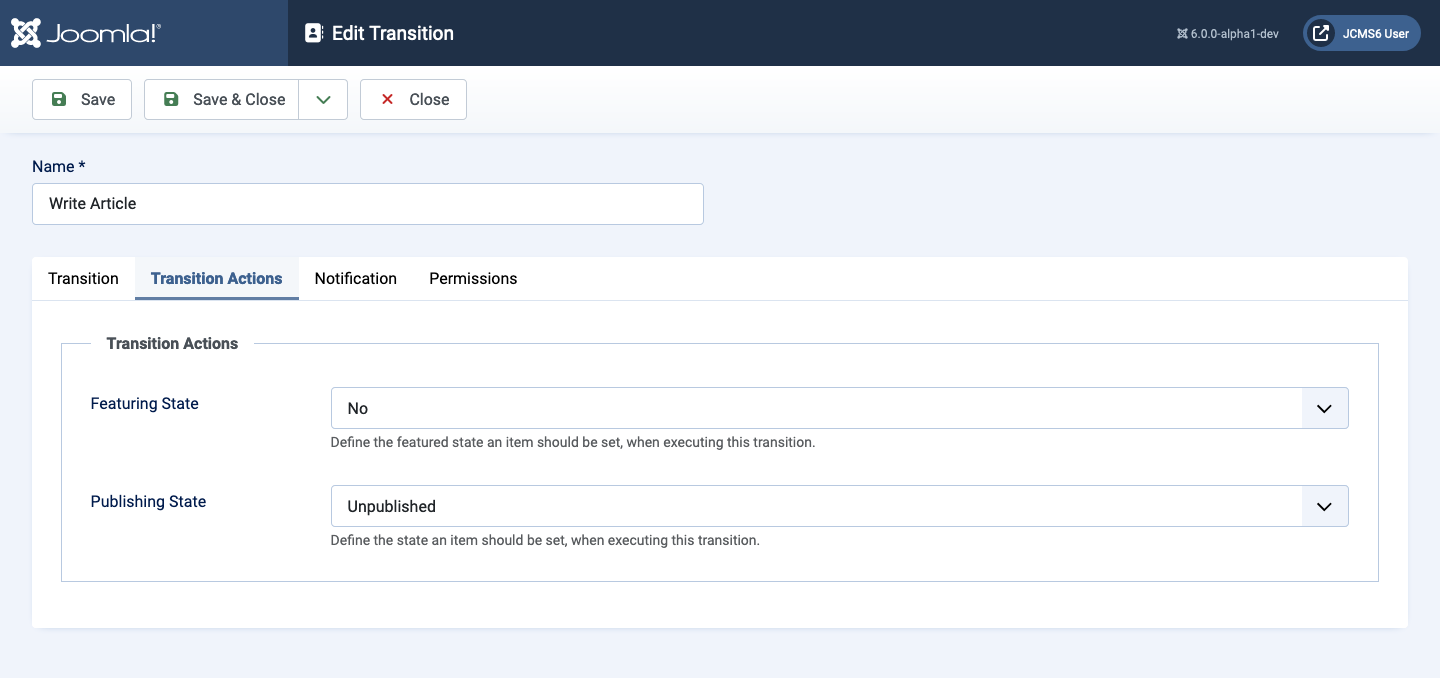
- Featuring State Whether or not the item will be Feaured.
- Publishing State Select from the list the target state.
The Transition Notifications tab is used to define whether a notification is sent for that state. For example if an article has been written but needs to be proofread, an email could be sent to notify the editor.

- Send Notification If set to Yes extra fields appear.
- Additional Message Text Add additional message text or use a language string to make the message text translatable.
- Usergroups Select who will receive the notification, for example all users in the Editor user group.
- Users Select individual users to receive this notification.
Permissions
The permissions tab controls access to this transition by selected user groups. Normally the permissions are inherited form the Permissions in the Articles: Options permission settings.
Workflow Transition Plugins
The workflow plugins are used for actions invoked by transitions. Go to System → Plugins and change the - Select Type - filter to workflow. Each of this plugins can be disabled if not required.
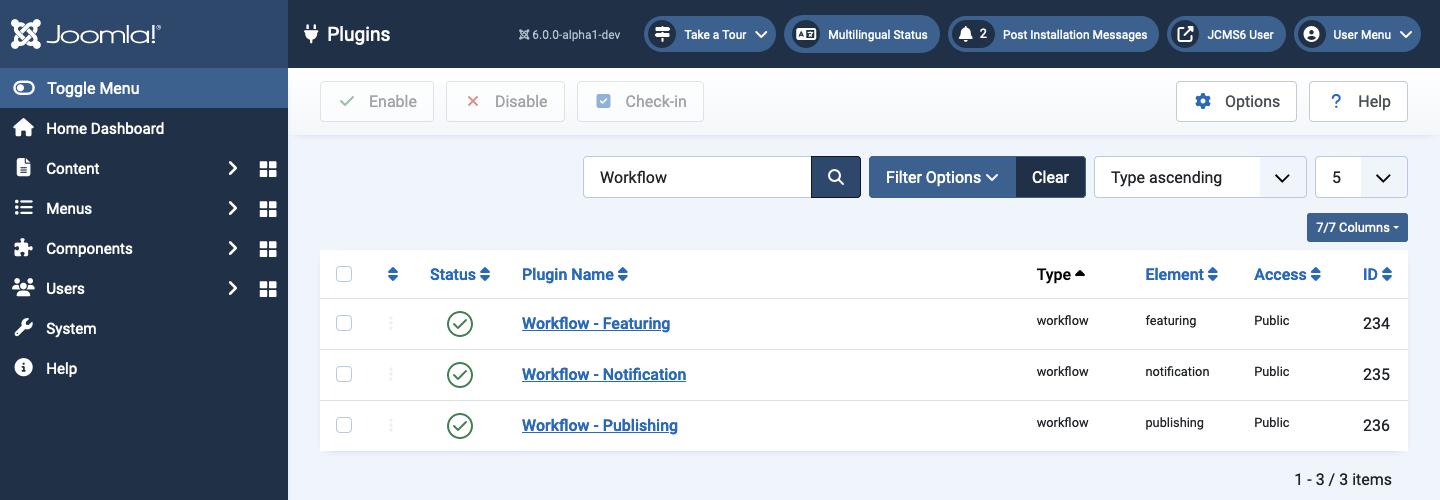
- Workflow Featuring This action implements the change of an article's Featured status from Yes to No.
- Workflow Notification This action implements notification of a user that a change of stage requires attention.
- Workflow Publishing This action implements a change of state of an article from one to another of Published, Unpublished, Trashed or Archived. If the user does not have permission to change state it will fail with an explanatory message. The transition that requested the change of state will still succeed!
Categories
Articles can be assigned to categories. They correspond to a certain workflow and can be customized in various ways. You can set a status, parent category and also restrict the access as well as the permissions. This option is not within the workflows screen. For this option you need to go to Content → Categories. Once there open any category and you will see a Workflows tab.

Example
Certain articles need to be available only for administrators or users of a higher rank.
- Create a category named Restricted
- Set all permissions on Allowed for administrators or higher.
- Move the articles concerned to the Restricted category.
This saves setting permissions on individual articles,
Versioning
When the workflow is enabled fields managed by the workflow are excluded from the versioning (like "state" and "featured") to avoid permission conflicts.
Examples
Some specific examples are available to illustrate how to use Workflows for different user groups:
Workflow Example 1
Introduction
A workflow consists of stages and transitions between those stages. For any article it is the current stage that is recorded in the database and used to identify the workflow and the transitions used by that workflow.
A single site may have many workflows. Here, a Newsletter Workflow is used as an example to explain how three individuals with different roles may be involved in the production of a newsletter article. The example uses the Joomla default Author, Editor and Publisher user groups. That has a problem: an Author can only see Published articles so cannot re-edit Unpublished articles. A method to avoid that problem is covered in Example 2.

Notice that the Basic Workflow is set as the Default. This may have troublesome consequences covered later in this article!
The Users
- Arthur is a user assigned to the Joomla Author Group. He can create new articles and edit his own articles but he cannot edit articles written by other users or change the state of articles. So he cannot publish his own articles. His job is to draft new articles.
- Eddie is a user assigned to the Joomla Editor Group. He can edit articles created by any other user, including Arthur and himself. He also cannot change the state of an article. His job is to review the articles submitted by Eddie, check for accuracy, spelling and grammar, quality of images and so on.
- Pru is a user assigned to the Joomla Publisher Group. She can do anything that Eddie and Arthur can do. In addition, she can change the State of an article. It his her job to decide whether an article is acceptable for publication and to publish it.
The Stages
There are four stages in this Workflow:

- Draft is the stage created by Arthur for a new article.
- Review is the stage where Eddie takes over to proof read the content.
- Approve is the stage where Pru takes over to decide whether the article is good enough to publish.
- Publish is the stage when the article has been approved and published.
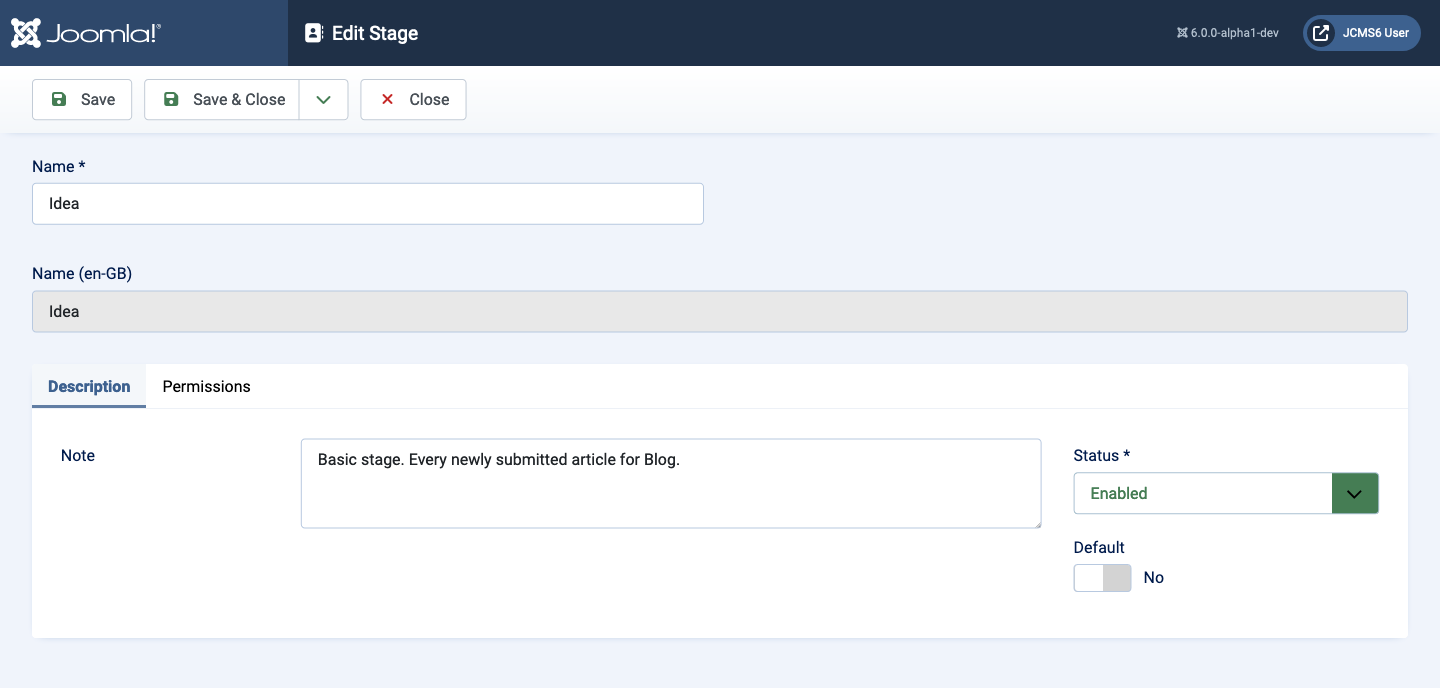
The stage data entry forms need little explanation, just a Name and Description.
The Transitions
Two transitions are required between each stage: one to revert the stage if more work is required in the previous stage; and a second to migrate to the next stage. Extra transitions are required to handle the demise of an article:

- Draft/Review to move the stage form Draft to Review.
- Review/Draft to revert the stage from Review to Draft.
- Review/Approve to move the stage from Approval to Review.
- Approve/Review to revert the stage from Approval to Review.
- Review/Publish to move the stage to Published and change the article status to Published.
- Publish To set the article state to Published when the transition is executed by an Author or Editor.
- Unpublish to change the article status to Unpublished.
- Archive to change the article status to Archived.
- Trash to change the article status to Trashed.
The last three transitions allow Pru to change the status of an article when it is no longer needed.
Edit Transition
The date entry form has four tabs starting with the Transition tab:

- Name It is best to use the Current and Target stages in the name.
- Current Stage The stage before the transition takes place.
- Target Stage The stage after the transition has taken place.
- Note Any explanatory notes to help explain the transition.
The Transition Actions tab:

- Featuring State Define the featured state an item should have after executing this transition. Leave this at -Non Selected- if the user likely to execute this transition does not have permission to feature articles.
- Publishing State Define the published state an item should have after executing this transition. Leave this at -Non Selected- if the user likely to execute this transition does not have permission to change article state.
The Notifications tab:

- Send Notification Set this to Yes where notifications are necessary, for example when Arthur needs to notify Eddie that an article is ready for review.
- Additional Message Text This is generic additional text to help the recipient.
- Usergroups You can choose to send the notification to one or more user groups or none and send notification to individuals instead.
- Users Select individual users from the list of users.
The Permissions tab:
Note that Author has Execute Transition set to Allowed (Inherited). Do not change these settings for other transitions that an Author should not use as this will also affect Editors and Publishers.
The Article Category
Each article is assigned to a workflow on first save. If the article is first assigned to a Category that has a Workflow selected it is assigned to that workflow. Otherwise it is assigned to the default workflow. That my be troublesome because the Workflow component does not provide a method to change the workflow once allocated. It can be changed by a Super User using the Batch Action in the Articles list page.
Create a Newsletter Category
A new Newsletter category is needed to display the Newsletter as a Category Blog and to ensure the Newsletter articles are assigned to the Newsletter Workflow.
The Newsletter Menu Item
For site visitors to see the Newsletter it needs to be the Home page or linked with a menu item. To follow this example create a new menu item of type Category Blog using the Newsletter category.
Try out the site menu item. It is likely to be a blank page with this message:
Login as Arthur
Remember Arthur the Author? After login, the Newsletter page should have a button labelled New Article. Select it to compose a new article.
Compose an Article
Fill out the article edit form as you would for any article. Except, before the first save look at the Publishing tab.
- Workflow Stage should be set to Run Transition Draft/Review.
- Category should be set to Newsletter.
When you have finished editing the article select Save or Save & Close.
Login as Eddie
Eddie the Editor does have permission to view Unpublished articles so the Newsletter page does show any Unpublished items for him to edit.
Review the Article
Select the article drafted by Eddie and make any changes required to make it better. When satisfied, in the Publishing Tab:
- Workflow Stage should be set to Run Transition Review/Approve.
Unlike Arthur who cannot see his article after saving, Eddie can see and edit the article again. He can also set the transition for the next stage to Approve/Publish. The transition will work but the article will not be published as Eddie does not have Publish permission.
Login as Pru
When the Approve stage was set in the workflow, Pru should have received a message prompting action. So login as Pru to review the article and set its Workflow Stage to Run Transition Publish. Save & Close the article to see the published result. Logout to see the result without the Edit link,
Afterthought: another stage is needed to allow Pru to revert the stage from Publish to Review if she wants Eddie to fix something.
Backend Workflow
The Author, Editor and Publisher user groups are intended for frontend use. The problem for Arthur is that he cannot access his draft articles from the frontend because his user group does not hae viewing access for unpublished articles.
You can allow backend access for all members of these groups as follows:
- Go to the Global Configuration page.
- Select the Permissions tab.
- Select Author and set Administrator Login to Allowed.
- Save
- Go to the Articles: Options page.
- Select its Permissions tab.
- Select Author and set Access Administration Interface to Allowed.
This will allow Arthur, Eddie and Pru to login to the backend wih access to the Content items. A much reduced Home Dashboard:

But Arthur has access to his draft articles:

Notice that Arthur cannot edit the last item in the list because it is not one of his own articles. The article title is not linked. Similarly, Arthur cannot edit any of the existing categories because he does not have permission and they too are not linked. He can create a new Category but it is Unpublished and he cannot publish it!
Fix for Wrong Workflow
If you assign an article to the wrong workflow there are two methods available to fix the problem.
Super User Method
- Go to the Articles list.
- Select the checkbox for the problem article.
- Select the Actions button in the Toolbar.
- Select the Batch button from the list.
- Select Change Stage from the Batch Process Selected Articles dialog.
- Select an appropriate target Workflow and Stage.
- Select the Process button.

Fallback Method
Alternatively, you can edit a database table with phpMyAdmin or similar.
Information required:
- The ID of the article from the last column in the Articles list.
- The ID of a stage in the required workflow from the last column of the Stages list of the Workflow you would like to use.
In phpMyAdmin:
- Browse the #__workflow_associations table to find the item_id that contains the ID of your article.
- Change the stage_id value to the stage ID that you looked up in the required workflow.
Go back to your articles list and check that the problem item is now using the correct workflow.
Workflow Example 2
Introduction
This example involves two users, Alice and Bob, who are respectively the chairperson and secretary of a committee. The workflow involves the preparation and approval of agendas and minutes of committee meetings. Charlie is a committee member who will have access to committee papers when they are published. The workflow uses the frontend only.
User Groups
First create new User Groups all children of Registered.
- Committee A child of Registered
- Chair A child of Committee
- Secretary A child of Committee

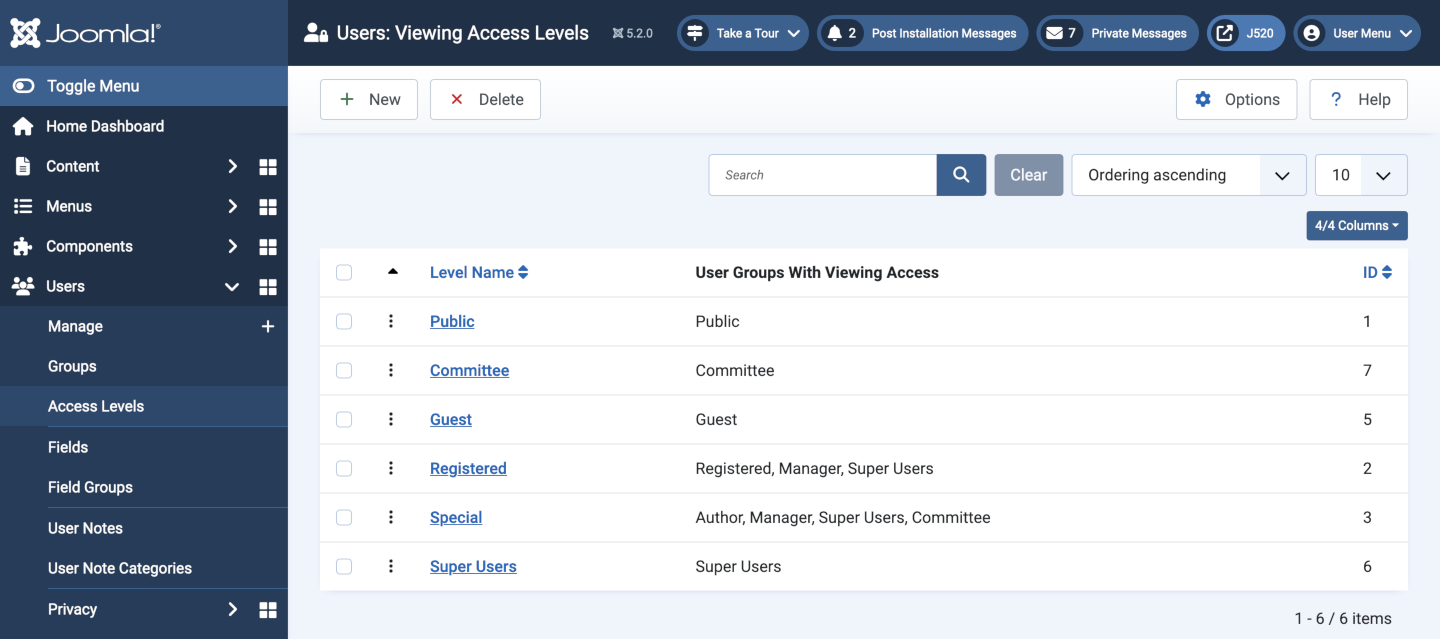
User Access Level
- Create a new level, Committee and add Committee to User Groups With Viewing Access.
- In the Special Access Level add Committee to the User Groups With Viewing Access.
Create Users
- Alice in the Chair group.
- Bob in the Secretary group.
- Charlie in the Committee group.
Create the Workflow
- Name Committee Workflow
- Description Workflow for preparation of Committee papers.
-
Permissions
- Committee All set to Inherited Not allowed (inherited).
- Chair All set to Allowed except Delete. Perhaps...
- Secretary All set to Allowed except Delete and Edit State.
Create the Workflow Stages
-
Draft
- Note Papers in preparation.
- Permissions All left at Inherited.
-
Review
- Note Papers awaiting approval.
- Permissions All left at Inherited.
-
Publish
- Note Papers published.
- Permissions All left at Inherited.

Create the Workflow Transitions
Draft to Review
This is the normal forward transition in the sequence of stages.
- Name Draft/Review
-
Transition tab
- Current Stage Draft
- Target Stage Review
- Note Transition to next stage.
-
Transition Actions tab
- Featuring State - None Selected -
- Publishing State - None Selected -
-
Notification tab
- Send Notification Yes Recipients need Receive System Emails enabled to receive email notifications.
- Additional Message Text Anything specific to this workflow?
- User Groups Chair
- Users An alternative to using User Groups.
- Permissions tab All set to Inherited.
Review to Draft
This is the reversion to a previous stage in the sequence invoked when the Chairperson requires more work by the Secretary. The form fields are similar to the Draft/Review fields except for the Note and the Current Stage and Target Stage being reversed.
Review to Publish
This is the transition that changes the state of an item from Unpublished to Published. Only the Chair has permission to make that change.
- Name Review/Publish
-
Transition tab
- Current Stage Review
- Target Stage Publish
- Note The final transition to publication.
-
Transition Actions tab
- Featuring State - None Selected -
- Publishing State Published
-
Notification tab
- Send Notification Yes Recipients need Receive System Emails enabled to receive email notifications.
- Additional Message Text A committee paper has been published and is now available to view.
- User Groups Committee
- Users An alternative to using User Groups.
-
Permissions tab
- Secretary Set Execute Transition to Denied.
Publish to Review
This is a change from Publish back to Review. Is it really necessary? A published article can still be edited by the Secretary or Chair. Perhaps a Committee paper with sensitive data has been published by mistake.
If required, create a Transition similar to the Review to Publish transition but with the Stages reversed, the Transition Actions / Publishing State set to Unpublished and a generic Additional Message Text message.
Archive
This is the transition executed when a Committee paper is no longer needed. In the workflow it remains in the Publish stage but the article State is changed from Published to Archived.
- Name Archive
-
Transition tab
- Current Stage Publish
- Target Stage Publish
- Note Change item state from Published to Archived.
-
Transition Actions tab
- Featuring State - None Selected -
- Publishing State Archived
-
Notification tab
- Send Notification No This is not a transition that requires action.
-
Permissions tab
- Secretary Set Execute Transition to Denied.
Create a New Category
- Title Committee
- Workflow Select Committee Workflow from the Workflows list.
-
Permissions
- Author, Editor and Publisher: All set to Not Allowed or left at Not Allowed (Inherited).
- Committee: All left at Inherited.
- Chair: All except Delete set to Allowed.
- Secretary: All except Delete and Edit State set to Allowed,
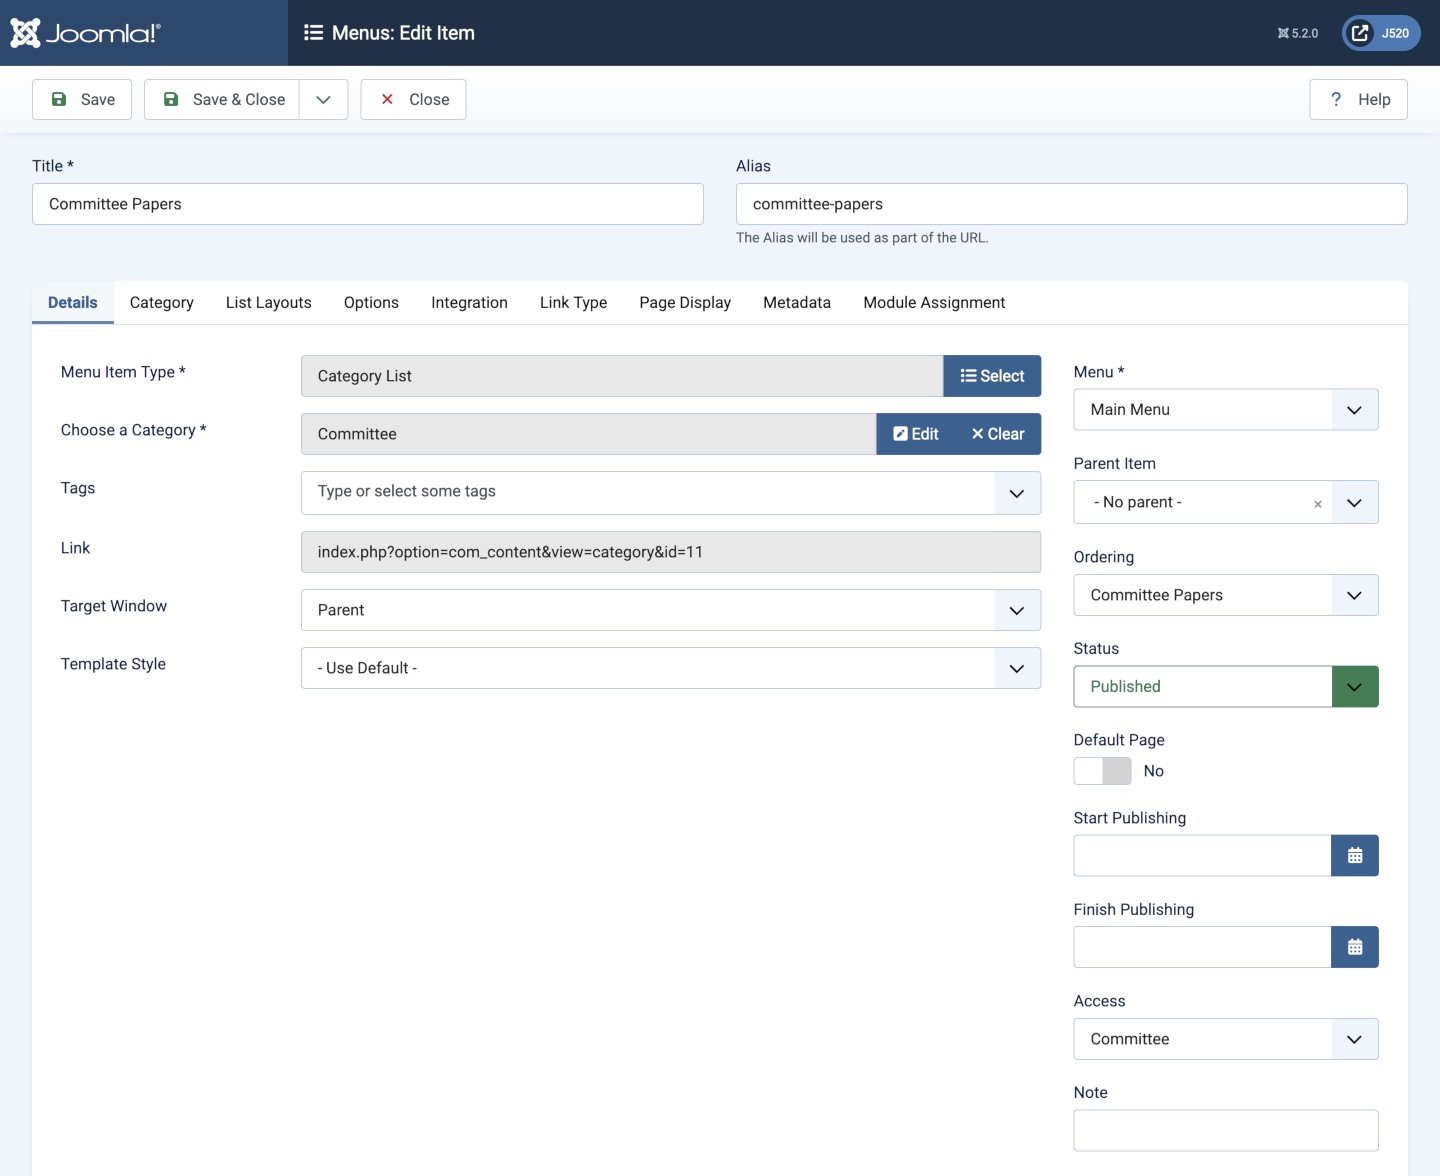
Create a Menu Item
- Title Committee Papers
- Menu Item Type Category List
- Choose a Category Committee
- Access Committee
Check the Site
Login as Alice, Bob, Charlie and a Super User in turn to see what they can see:
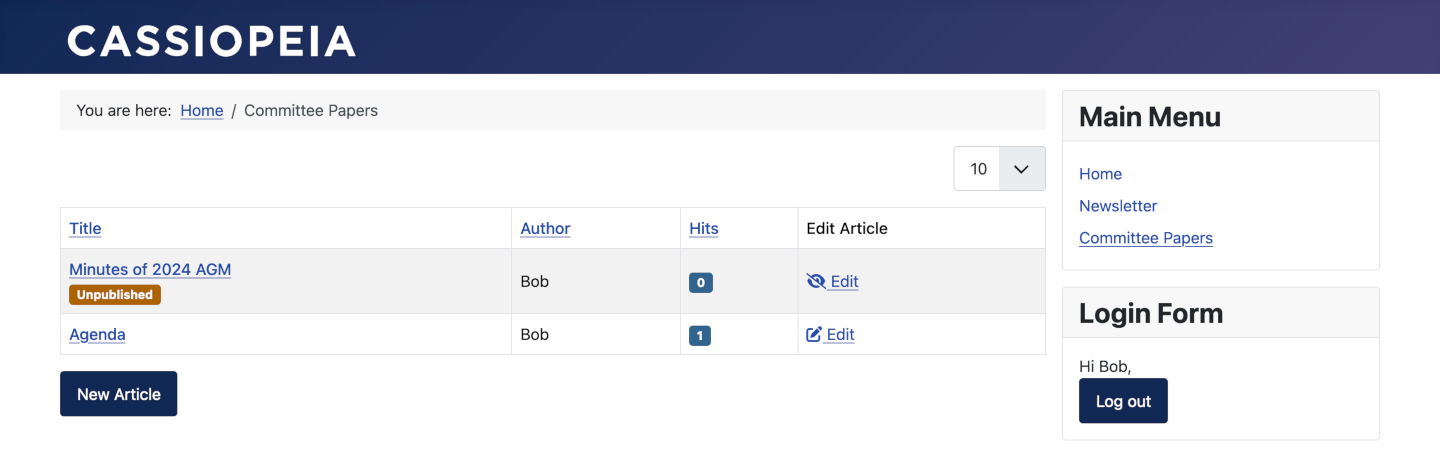
Alice, Bob and Charlie can see the Menu item but nobody else can, not even a Super User. After selecting the menu item, Alice and Bob can see a table of Committee papers including any that have not been published. Charlie can only see a table of published Committee papers or an explanatory message if none have been published.
Alice and Bob can also see an Edit link for each article and a New Article button. This is usually used by Bob to create a Committee paper but Alice can do that too.
To Create and Publish a Committee Paper
- Login as a Secretary and select the New Article button in the Committee Papers page.
- Enter the text and Save. This can be done over several edit sessions, perhaps over several days or weeks. The article remains Unpublished and in the Draft stage until...
- Select the Publishing tab in the edit form and set the Workflow Stage to Run Transition Draft/Review.
- Select Save & Close to run the transition.
- The work of the Secretary is complete for now and a message has been sent to the Committee Chair.
- The Chair logs in, checks the paper ready for Review and uses the Review/Publish transition to make the paper Published. The work of the Chair is complete for now and a message is sent to the Committee members.
- Committee members can login and access the published paper.