Media
Image Crop Resize Rotate
Introduction
After upload you may have realised there is a problem with an uploaded image. Common problems include:
- The image is much too big.
- The interesting part of an image is in a small area.
- The image is rotated through 90 degrees.
These are the problems that the Media component can handle.
As an example, the following image shows a group of animals that is a little too big for its intended purpose. It could be cropped or it could be resized.

Crop
The crop tool allows you to drag to define a crop area. This is a little tricky. First set an aspect ratio or None as you see fit. Then click and drag the corners or top or bottom or either side of the selection box which is outlined in blue. You can drag the inside of the selection box to move it to centre your subject. You may also manually adjust the X- and Y-Axis offsets and the width and height.
Look carefully at the screenshot and you will see a selection box outline of the area to be included in the proposed crop.
The quality selector indicates how much compression should be applied. Too much and the image size in bytes will be too big. Too little and the display quality of the image will be poor. Bug Warning: At the moment the Quality control is not working. This results in a modified image being larger than it needs to be, sometimes much larger than the original!
When satisfied, select the Save button in the Toolbar.
The newly cropped image will be saved. There is no Undo! In the Crop view the crop box and values in the crop fields will be wrong (another bug?) but the crop is done, so move on.
Resize
To resize an image select a suitable width. The height will change to keep the aspect ratio of the original image.
Rotate
If an image is rotated through 90 degrees, select the Rotate tab and the appropriate angle.
Managing Media
Introduction
In Joomla, media are images and files that appear as illustrations or links in articles, modules, templates and so on. An important feature of media is that they are delivered directly by the web server without being processed by Joomla code. This is fast and efficient. Also, be aware that media are usually stored in the images folder of your Joomla web site. Do not confuse this with the media folder, which contains javascript and style sheet files.
Image and file media are managed with the Media component of Joomla. It allows you to organise media content in a folder tree, upload individual items, perform some elementary image editing functions, and place images and links directly into articles.
How to Access
From the Joomla Administrator interface there are several routes to open the Media component:
- Select Content → Media from the Administrator menu.
- Select Site panel → Media from the Home Dashboard.
- Select CMS Content → Media from an article edit screen.
In the first two cases the Media component appears in a normal component screen. In the last it appears in a modal dialog.
Screenshot
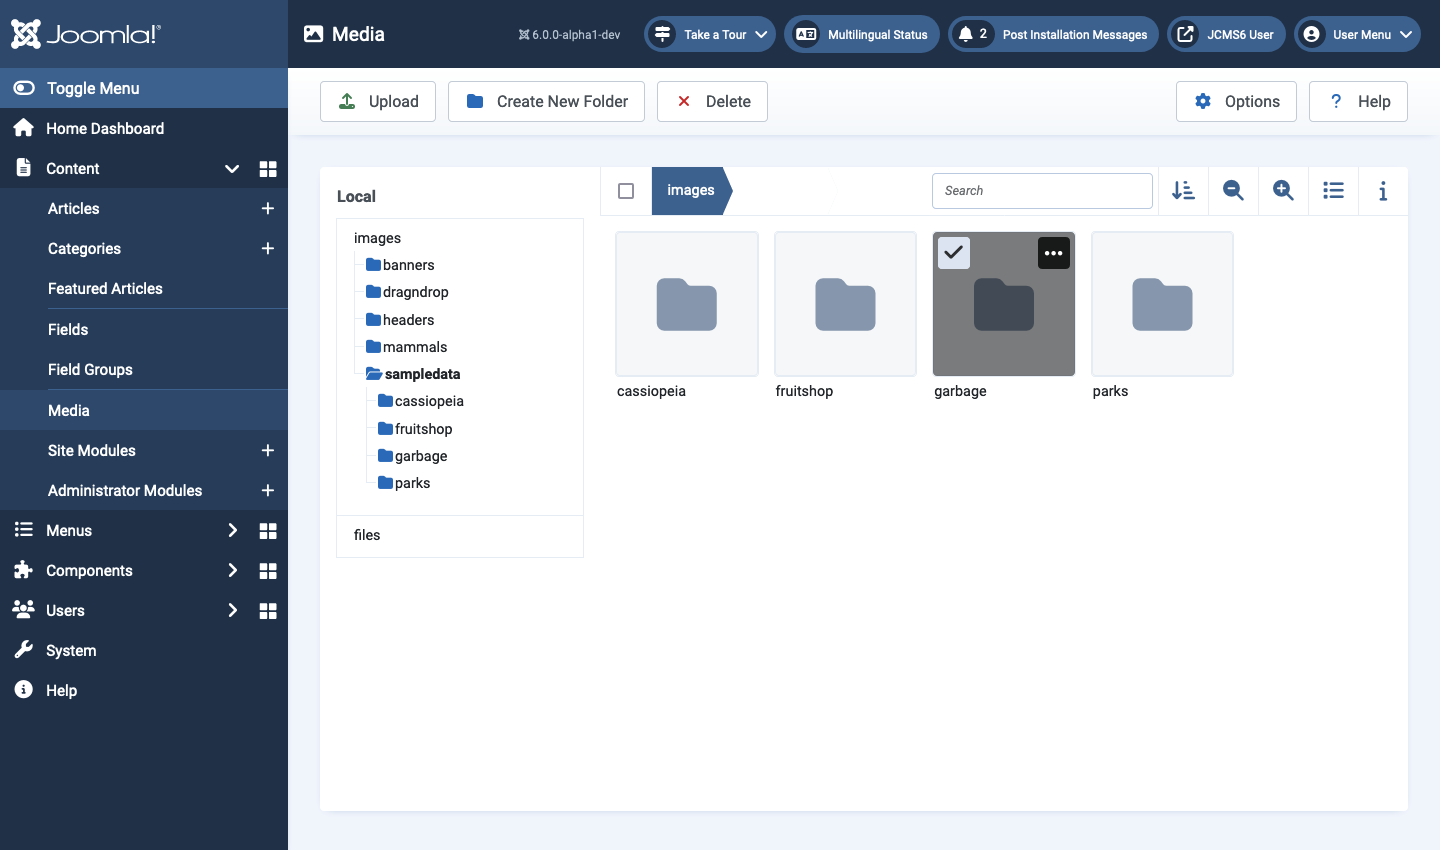
The following image shows the Media page just after Joomla installation but with the cassiopeia/sampledata folder selected. A files folder was added to store non-image files and an extra folder named garbage has been added to illustrate folder deletion:

Managing Folders
The sub-folder names in your images folder tree become part of the image url so it is important for linking and search engine optimisation purposes that the names conform to a convention:
- all lower case
- no spaces or punctuation
- if necessary, use a minus sign to create human readable words, for example deciduous-trees rather than deciduous_trees.
Before creating much content for your site it may pay to think ahead to how you might categorise your content and perhaps create an images folder tree that is similar to your category tree. Otherwise you may end up with a very large number of images and files in the root of your images tree and that will become difficult to manage. If you decide to move images into a better structure later you will have to find the links to those images in your articles and change them. That could be a time-consuming, daunting task!
Folder Navigation
Use the folder tree in the Local column to select a folder. In the case illustrated above the cassiopeia folder was first selected. That revealed the sampledata folder which was then select to show its content.
The current location is also indicated in the breadcrumbs above the images. In this case images → cassiopeia → sampledata.
If you select a different folder the previous folder at the same level closes.
Creating a folder
- Select the parent folder under which the new folder should be created.
- Select the Create New Folder button.
- In the Create New Folder popup window, enter a name for the folder in the Folder Name field.
- Click the Create button.
- The new folder will appear in the selected parent folder along with a green Success system message.
Deleting a folder
Warning: deleting a folder will also delete all contents of the folder!
- Select the parent of the folder to be deleted using the directory tree shown under Local. That will show all of the folders and files in the parent.
- Move the cursor over the folder to be deleted in the media area. It will turn grey and a button will appear near the top left.
- Select the button. A tick will appear to indicate it is selected.
- Select the Delete button from the Toolbar.
- In the Confirm Delete popup dialog select the Delete button. The folder will be deleted along with all of it files, subfolders and their files.
The folder selected for deletion is illustrated below:
Media Area Toolbar
This is the bar above the list of images, files and folders that has buttons for a variety of tasks.
Select box
A check box that allows you to select all of the items in the folder displayed in the media area. You might want to use it to delete all of the current items without deleting the folder.
Breadcrumbs
Use the folder names above the media area to go backwards in the folder hierarchy.
Double click a folder name in the media area to open that folder.
Search
If you have a long list of images and files you can search for items containing any group of characters. The search is progressive: as you add characters to the search term the list is reduced to just those containing that character string.
Magnify
Use the magnify buttons to enlarge or reduce the thumbnail size. Depending on the size of your screen you may see 2, 4, 6 or 8 thumbnail images side by side.
List or Thumbnail Views
In thumbnail view, select the list symbol to switch to list view. In list view, select the thumbnail symbol to switch to thumbnail view. In list view you will see information on image size and dimensions, amongst other data.
Information Icon
Select the Information icon to open a side panel showing information about whatever is selected.
Media File Locations
Introduction
By default, Joomla stores both user images and document files in the /images folder of the the Joomla installation. Any links to such media are not directly processed by Joomla. The web server sends them when requested by the browser.
If you have a lot of documents you might like to keep them in a separate folder, most obviously a /files folder also in the root of the Joomla site.
To set up a location for files that is separate from images first create a new folder in the root of your installation, for example files. Remember, it will be part of a url link so lower case and no spaces or punctuation marks.
FileSystem - Local Plugin
Find the FileSystem - Local plugin in the list of plugins and open it. Add your newly created files folder to the list of places you can keep media. Just click on the + button and select files from the list of available folders.
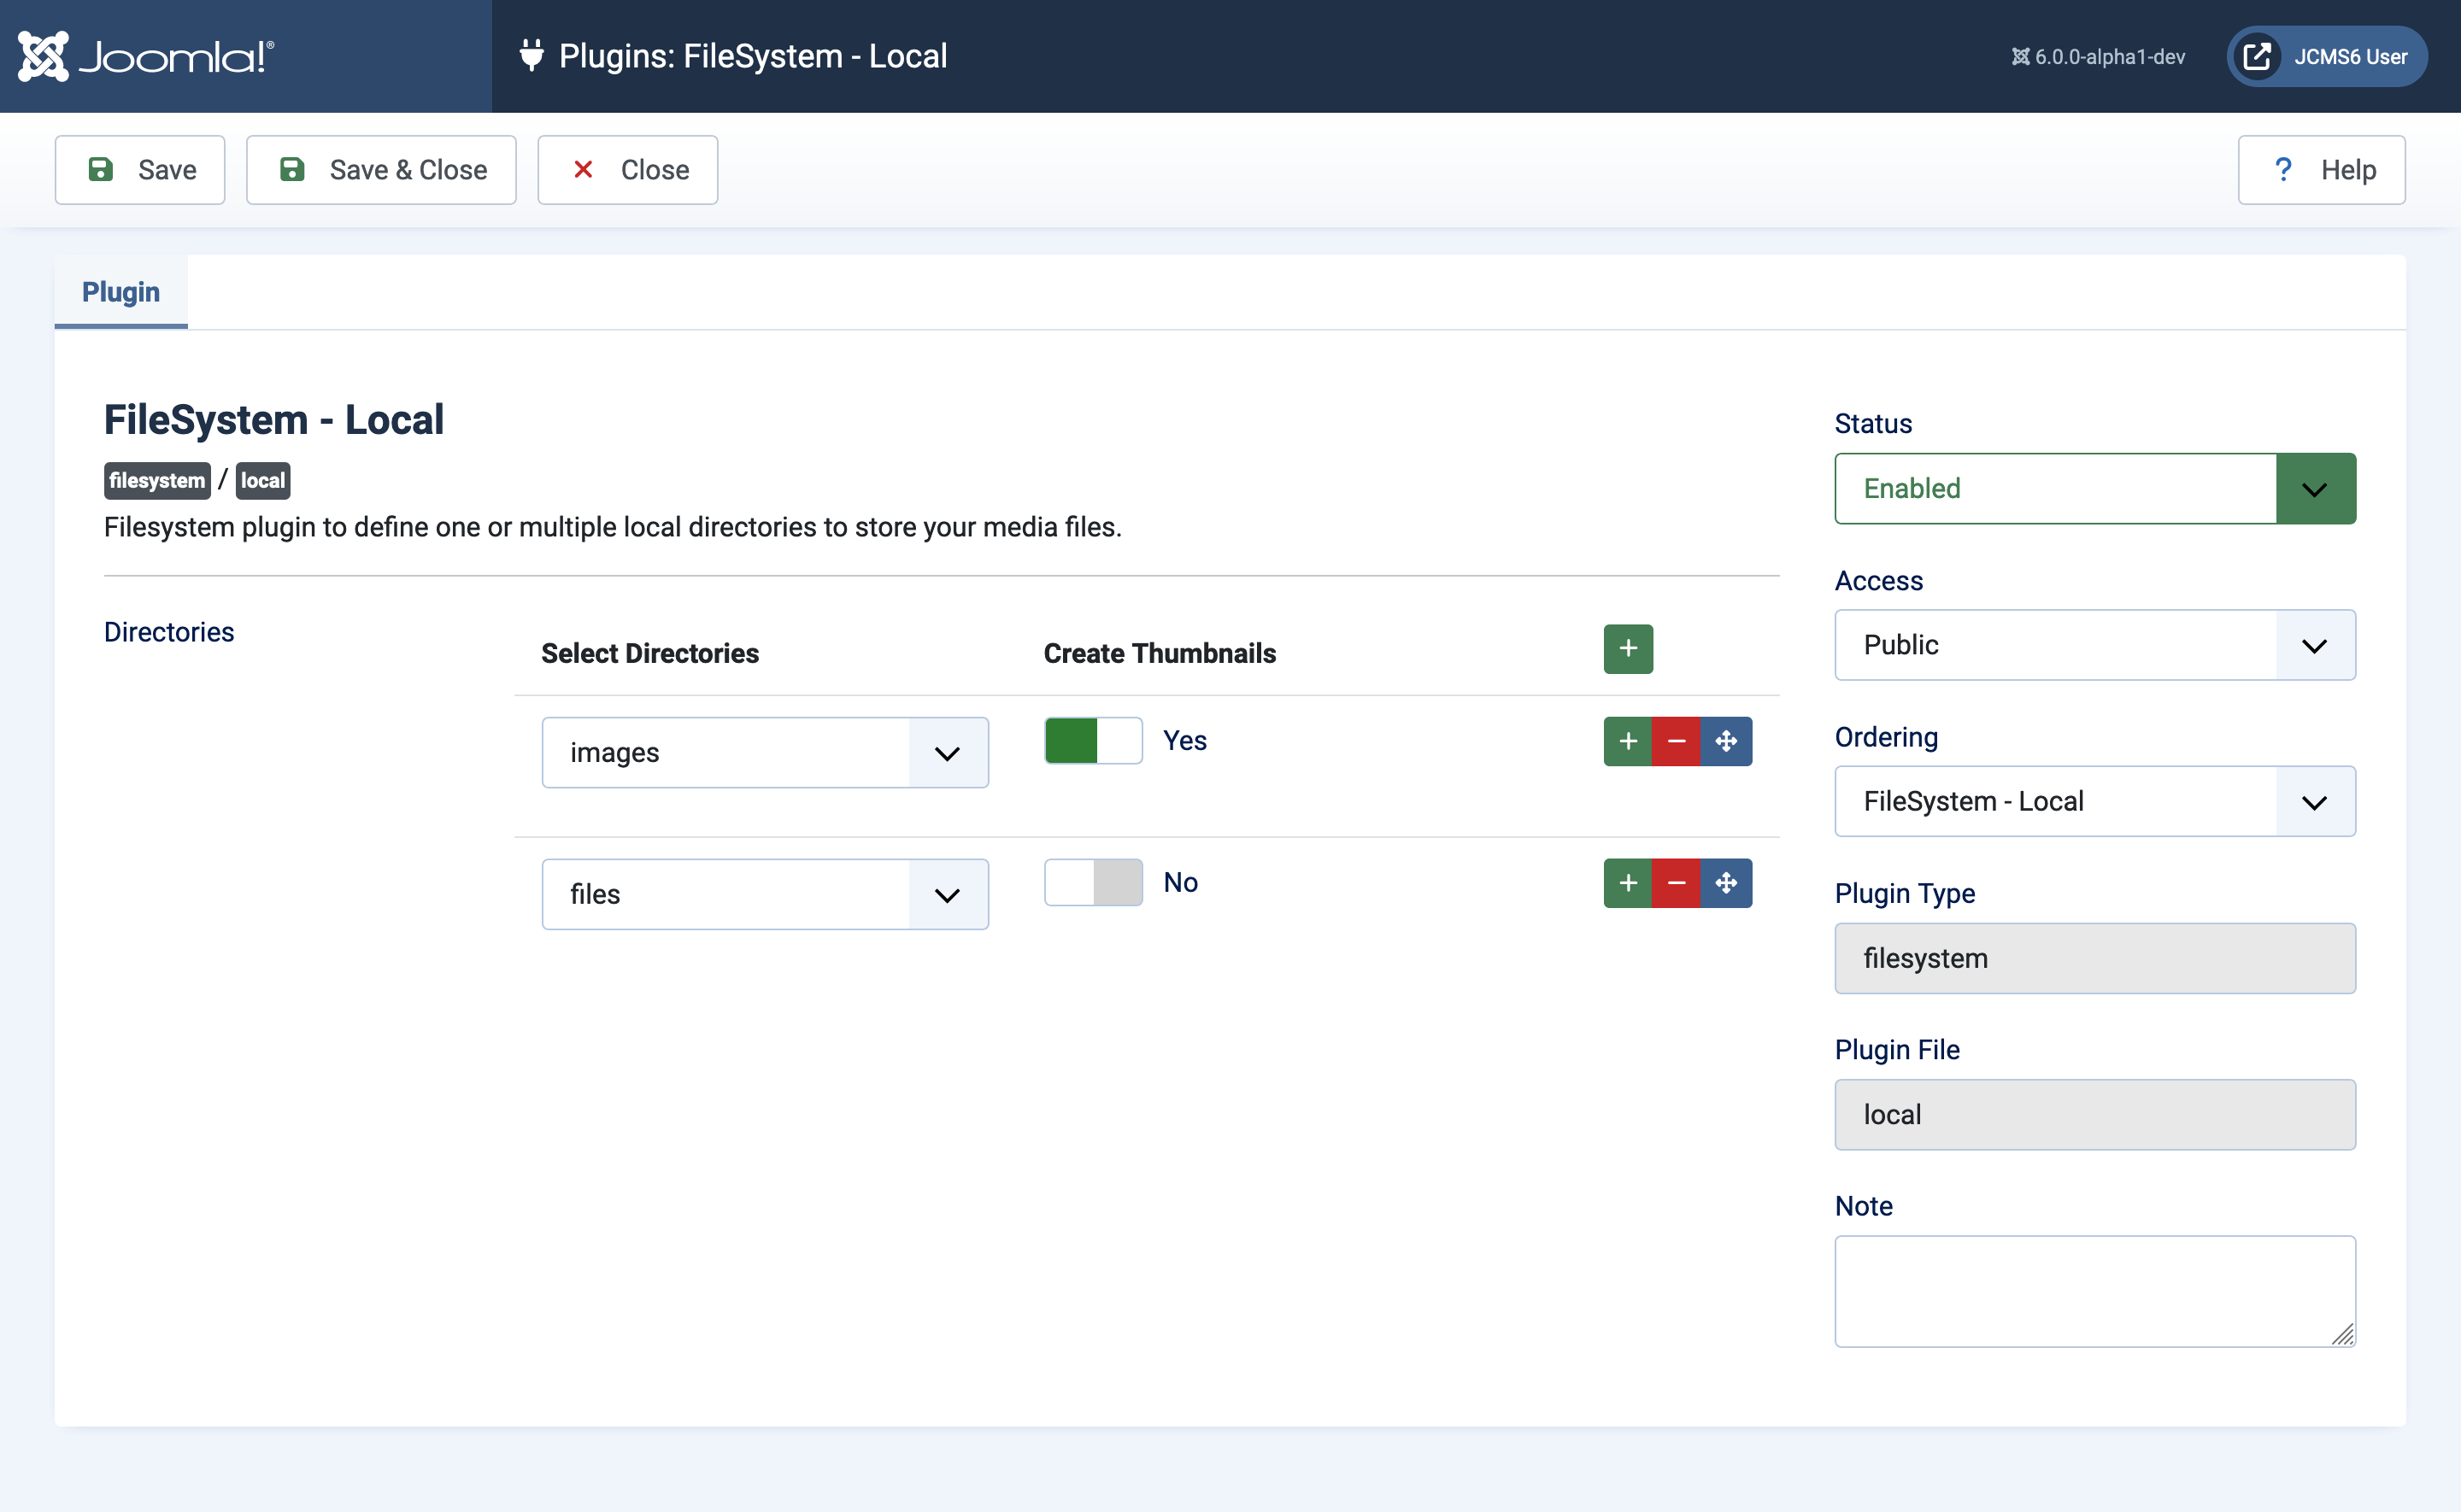
The Create Thumbnails option set to Yes causes creation of small images with a maximum height or width of 200 pixels in media/cache/com_media/thumbs with the same folder structure as the media folder. It should greatly increase the display speed of a folder with many images. It is not needed for files as they are represented by icons.
Make sure the plugin is enabled. Save & Close.
Media: Options
Introduction
The Media: Options page is used to control upload and storage of media, both images and files. Beware: there are security implications associated with some types of file - a hacker's way in.
To access the Media: Options form select the Options button in the Toolbar on the Media page. The fields are well commented and provided with default values that should be suitable for almost all sites. You usually only need to use the options form if you wish to keep Files separate from Images or if you have an unusual file format not included in the default list.
Screenshot
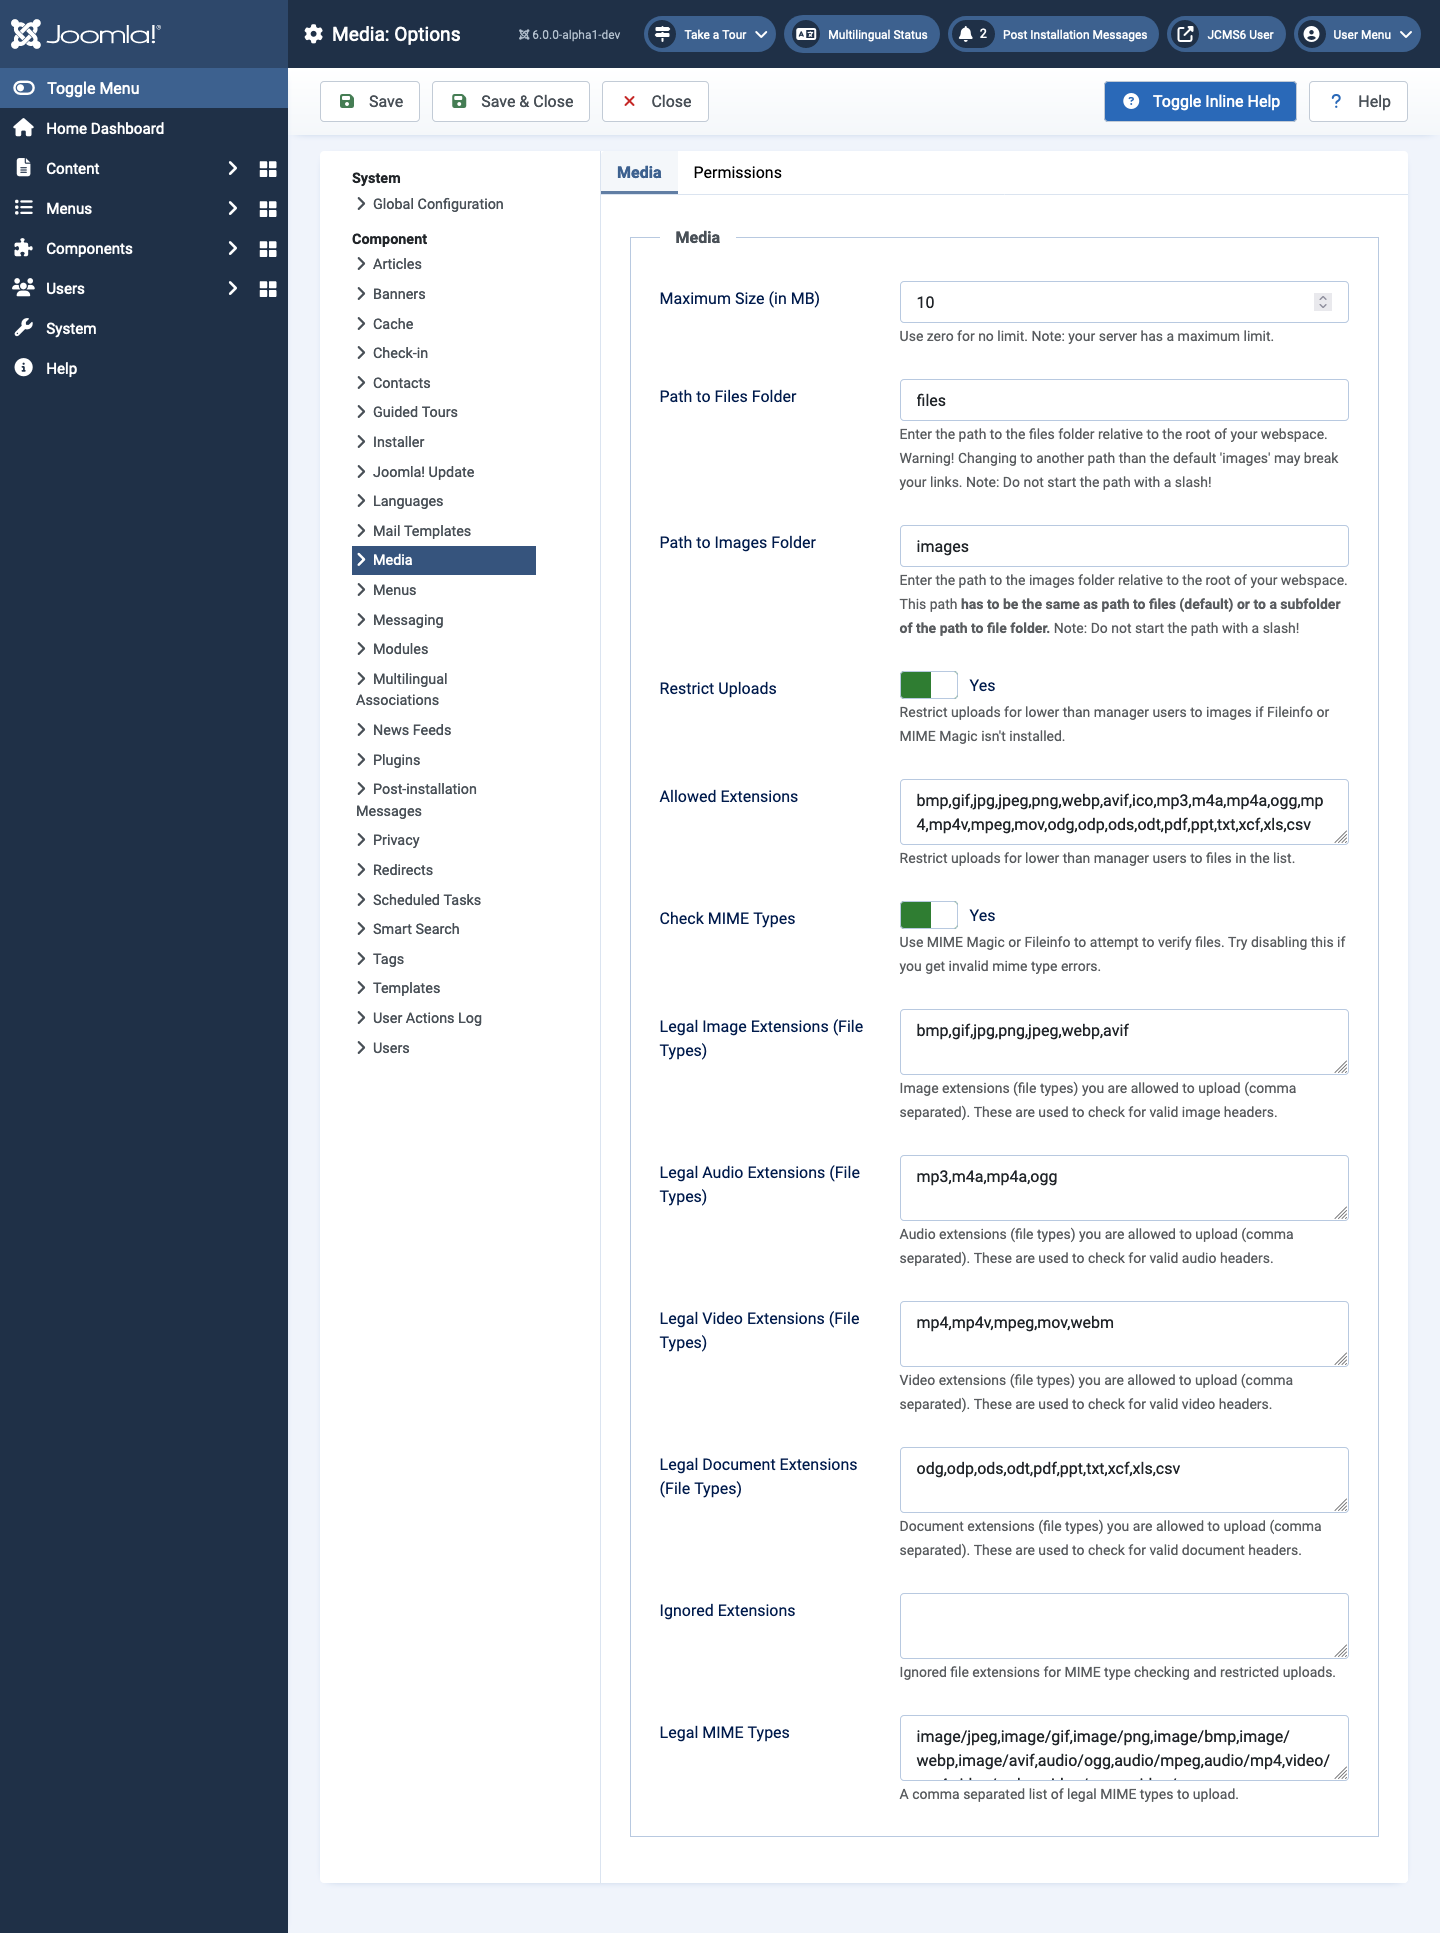
Path to Files and Folders
These are separate items in the configuration form but they both point to the the images folder in a new Joomla installation. If you would like to store non-image media separately (for example PDFs, Spreadsheets and Text files) use the following steps:
- Create a folder named files in the root of your Joomla installation.
- Enable the * FileSystem - Local* plugin and configure it, described in the article on Media File Locations.
- Enter the folder name, files, in the Path to Files Folder field of the Media Options Form
In the Options form enter the folder name in the Path to Files Folder field. Make sure you do not use the name of an existing core Joomla folder.
When set up, you will be able to choose between the images and files folders in the Local part of the Media view.
Additional Image or Document Types
You may find that an Image or Document cannot be uploaded. If so, check that its extension is amongst the Allowed Extensions, that its extension is amongst the Legal Extensions Types for the media, and that it is amongst the Legal MIME Types (you may have to look this up). All three must be correct or upload will be denied.
Upload Delete Rename
Simple Media Functions
The simple media manipulation features include Upload, Delete and Rename. At this stage it does not matter whether you are working with images or files.
Upload
In the Media screen, navigate to the folder where you want the item to be located. Note that the media component does not have an option to move a file to another folder after upload but you can do that with a system or cPanel file manager.
Select the Upload button in the Media Toolbar to open your system file browser dialog box. Navigate your local file system to select the image or file you wish to upload. Select the dialog's Open button. After a short delay, depending on its size, the file will appear in the media list.
Tips
- Modern digital cameras can take photographs that are enormous. You may wish to pre-process images to crop and/or resize before upload. The Media component can do that to some extent but sites using inexpensive shared hosting may run into memory problems. Aim for final image sizes to suit the purpose. If in doubt, no more than 1200 pixels wide.
- If an image with the same name already exists in the folder it cannot be re-uploaded. Delete the image first, or rename the image prior to uploading.
- You can only upload file types that have been set up in the Media Options. Be careful! There are security implications involved in file uploads
- Go to Options to change upload sizes and image requirements.
Delete
Select the item you wish to delete. Select the Delete button in the Media Toolbar or the dropdown menu of the item to be deleted. A dialog box will ask you to confirm that you wish to delete the selected item.
Rename
Place the cursor over the item you wish to rename and select horizontal ellipsis symbol to open the item's manipulation menu. Select the Rename item.
In the Rename dialog enter a new name without the file-type suffix. That is taken care of for you. Select Save to complete the renaming.